If you are restoring a Suzuki GSX-R after cosmetic damage, preparing a dedicated track bike, or changing its color scheme, choose a pre-painted replacement kit only after confirming four details: the exact GSX-R model, engine size, model year, and the fitment range stated on the specific product page.
The short answer: a model-specific ABS kit can be a practical option, but no aftermarket fairing should be assumed to fit exactly like an original Suzuki panel. Pre-drilled holes can reduce installation work, yet final alignment also depends on the accuracy of the kit, the condition of the motorcycle’s brackets and stays, and correct installation.
Before ordering, compare the listing’s fitment table, panel count, finish, included accessories, production lead time, and return or customization terms. This guide explains how to verify those details, inspect a delivered kit, and install it without forcing panels or relying on instructions from a different GSX-R generation.
Confirm the Exact Suzuki GSX-R Model and Year
GSX-R600, GSX-R750, and GSX-R1000 bodywork is not universally interchangeable. Suzuki has changed headlights, intake ducts, fairing stays, exhaust layouts, tabs, and mounting locations across model years, so a panel that looks similar in photos may still be incompatible.
Use this three-part check before selecting a kit:
-
Identify the motorcycle: confirm GSX-R600, GSX-R750, or GSX-R1000 and the model year shown on the registration or title.
-
Inspect the existing bike: photograph the front stay, side brackets, intake ducts, lights, and damaged tabs; bent hardware can affect the fit of any replacement panel.
-
Match the listing: verify that the product page explicitly names the same model, displacement, and year range, then ask the seller to confirm fitment if any detail is unclear.
Some GSX-R600 and GSX-R750 model years may share bodywork, but never assume compatibility from displacement or appearance alone. If the motorcycle has been repaired, also check that the fairing stay and subframe are straight before blaming a new panel for misalignment.
ABS, Molding, and Fitment: What the Listing Should Prove
ABS is commonly used for sportbike bodywork because it can provide a useful balance of rigidity, weight, and impact tolerance. Manufacturing method matters, but “injection molded” alone does not prove perfect fit; tooling accuracy, trimming, tab quality, drilling, and quality control all affect the finished kit.
Evaluate the Finished Panel, Not Only the Process
Look for a product page that identifies the material and shows clear photos of inner surfaces, tabs, vents, and mounting holes. The panel should have clean edges, consistent thickness around stressed areas, and no visible cracks or distortion.
Injection molding can support repeatable shapes when the tooling and process are well controlled. It does not eliminate the need to inspect every panel on arrival or to dry-fit the full kit before final tightening.
Pre-Drilled Holes Are Helpful, Not a Fitment Guarantee
Avoid unsupported fitment percentages. A more useful standard is whether the listing identifies the exact motorcycle, shows the panel set, and provides a clear process for resolving missing, damaged, or incompatible parts.
Pre-drilled holes can reduce preparation work, but tabs and holes still need to align without excessive force. Do not enlarge holes, cut tabs, or modify painted parts until fitment has been confirmed, because modifications may affect return eligibility.
Be Cautious with Manufacturing Comparisons
Do not judge a kit solely by a broad comparison between injection and compression molding. Ask instead how the panels were trimmed, drilled, checked, packed, and matched to the stated model-year range.
If a listing expects extensive drilling, stretching, or reshaping, clarify the installation requirements before buying. Forcing ABS under tension can damage paint, tabs, or mounting points.
The safest approach is to choose a documented, model-specific kit and verify the delivered parts before installation. Fitment quality should be demonstrated by the correct SKU and a careful dry-fit, not by a manufacturing label alone.
Evaluate the Paint System and Color Match
A pre-painted kit should be evaluated for finish consistency, decal placement, edge coverage, and the written paint specification. Marketing terms such as “showroom finish” are less useful than clear product photos and SKU-specific details.
Clear Coat Quality Matters More Than a Universal Layer Count
A typical painted panel may use primer, color, graphics, and a protective clear coat. The exact process can vary by design and product, so verify the finish described on the specific listing rather than assuming every kit uses the same number of coats.
A clear coat should provide an even surface over color and graphics. It can improve gloss and resistance to routine washing and weather exposure, but it does not make the paint immune to stone chips, fuel spills, harsh solvents, or abrasion.
-
Surface finish: inspect gloss or matte consistency under bright, indirect light.
-
Graphic protection: confirm whether decals are above or below the clear coat and inspect their edges.
-
Care requirements: follow the seller’s guidance for curing time, washing, fuel cleanup, and compatible cleaners.
UV and Environmental Claims Should Be Product-Specific
If UV resistance is important, look for that statement on the exact product page or request written confirmation. Any painted motorcycle part can fade or weather over time, so storage, cleaning, climate, and exposure also affect appearance.
Expect Possible Differences from Aged Factory Paint
A new aftermarket panel may not perfectly match an older fuel tank or retained factory panel, even when the design references an original color scheme.
UV exposure, oxidation, prior refinishing, and production variation can all change color. Ask for current product photos or a color sample when matching an existing tank is critical, and consider replacing visually adjacent panels together.
Delivery-Day Inspection Checklist
Inspect and inventory the kit before removing protective film, drilling, trimming, or installing hardware:
-
Check each panel for shipping damage, cracks, paint runs, trapped dust, or inconsistent texture.
-
Compare the delivered finish with the written specification; a clear-coat layer count cannot be verified reliably by touch.
-
Inspect mounting tabs, vents, edges, and holes for cracks or incomplete trimming.
-
Lay adjacent panels together and check color, graphics, and seam continuity.
-
Compare every delivered component with the package list on the exact SKU, including any windscreen, heat material, trim, or hardware.
A Safer DIY Workflow for Replacing GSX-R Fairings
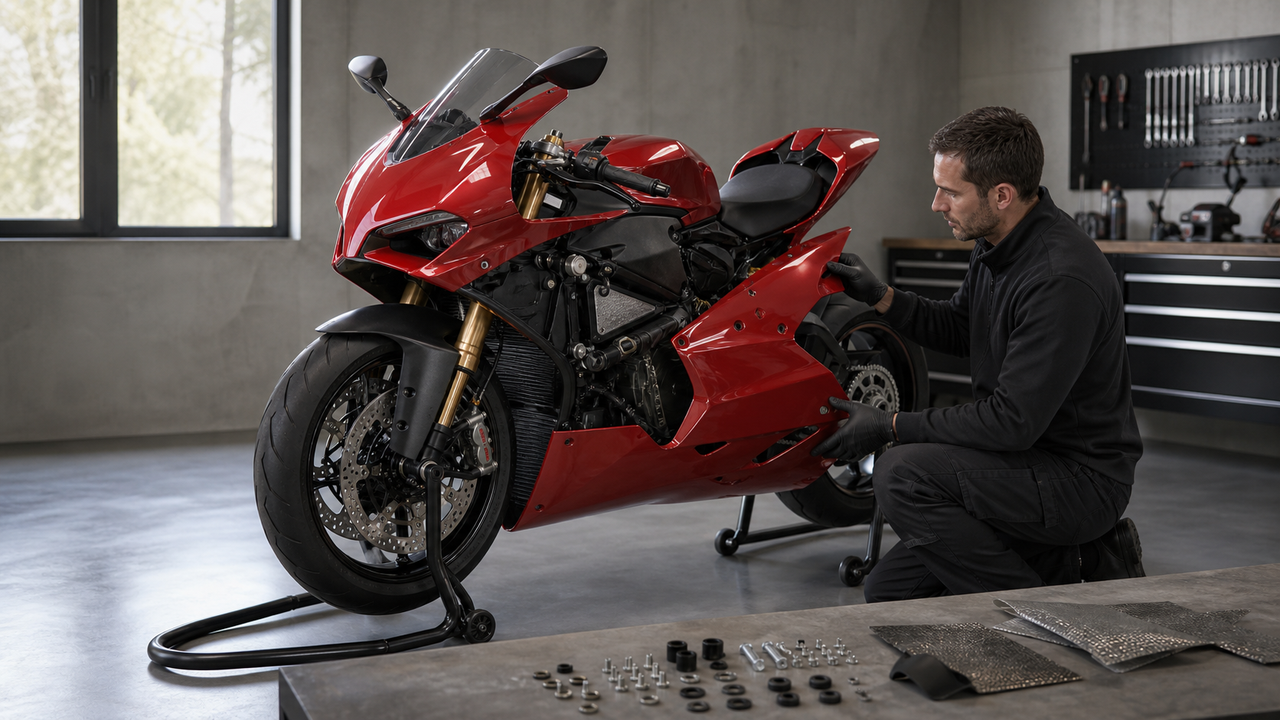
Fairing replacement can be a home-garage project for an experienced owner, but the tools and procedure vary by model year. Use the correct Suzuki service information or a qualified technician when the job involves electrical connectors, lighting, intake components, damaged brackets, or safety-critical hardware.
Step 1: Document the Bike and Inventory the Kit
Work in a clean, well-lit space. Photograph every seam, fastener, wiring connector, spacer, rubber grommet, and heat-protection piece before removal, then protect painted panels with clean blankets or foam.
Sort original hardware by location and compare the delivered kit with the SKU’s package list. Replace damaged fasteners only with hardware that has the correct thread, shoulder, washer, and length for that mounting point.
Step 2: Follow the Model-Specific Removal Sequence
There is no single top-down removal sequence for every GSX-R. Follow the service procedure for the exact model and year, support panels as fasteners are removed, and disconnect electrical components only after identifying the correct connector and battery precautions.
-
Mirrors and upper cowl: some GSX-R models integrate turn signals into the mirrors, while others differ. Photograph and label any connectors before separation.
-
Side panels and intake pieces: locate hidden push pins, grommets, ducts, and interlocking tabs from the model-specific instructions; do not pull against resistance.
-
Tail bodywork: confirm the seat, light, signal, and subframe attachment sequence for the exact year before spreading or sliding painted parts.
Step 3: Transfer Required Protection and Components
Compare the inside of the original and replacement panels. Retain or replace OEM heat barriers, foam, grommets, trim, and brackets as specified for the motorcycle, and verify clearance from the exhaust, radiator, hoses, wiring, and moving parts.
Do not assume heat material, a windscreen, fasteners, or mounting accessories are included. If the SKU includes them, install them only according to the seller’s instructions and the motorcycle’s service information. Ask the seller before using substitute adhesives or drilling new holes.
Step 4: Dry-Fit Before Final Tightening
Position the panels in the order specified for the exact motorcycle. Hand-start compatible fasteners and confirm tabs, ducts, lights, seams, and clearances before applying final torque.
Keep fasteners loose enough for initial alignment, but never stretch a panel to reach a hole. Tighten hardware to the applicable service-manual specification and use the required washers, grommets, or thread treatment. Overtightening can damage plastic and undertightening can allow bodywork to loosen.
Before riding, test lights and signals, turn the handlebar fully in both directions, inspect tire and exhaust clearance, confirm that no wiring or hoses are pinched, and recheck every fastener. If alignment suggests a bent stay or subframe, stop and have the motorcycle inspected.
How to Evaluate an Amotopart GSX-R Fairing Listing
Amotopart lists pre-painted Suzuki fairing kits across multiple GSX-R models and year ranges. The useful question is not whether every kit shares one specification, but whether the exact product page matches your motorcycle and clearly states the design, material, finish, contents, production details, and after-sales terms.
Start with the Model-Year Collection and Exact SKU
Use the Suzuki collection to narrow results, then open the individual product page. Confirm the model, displacement, and year range in writing; similar graphics do not establish compatibility.
Representative Amotopart listings describe ABS construction and pre-drilled mounting holes, but those details must be checked on the exact SKU you plan to buy. Browse the current Suzuki fairings and bodywork collection, then request fitment confirmation before modifying or installing the kit.
Verify the Package Contents Line by Line
Package contents vary by product and order. Use the exact listing and order confirmation as the source of truth rather than assuming every kit includes the same accessories.
-
Paint and graphics: verify the finish, clear-coat description, and whether customization changes production time.
-
Heat protection: confirm whether any heat material is included and whether additional OEM protection must be transferred.
-
Accessories and hardware: check the windscreen, trim, fasteners, grommets, and bolt kit individually.
Confirm Customization Before Production
Amotopart advertises a customization service for fairing designs. Before ordering, submit reference images and confirm the approved layout, colors, decals, production time, any fees, and the return or cancellation conditions in writing. A custom order should not be assumed to match aged factory paint or remain eligible for the same returns as a standard design.
Common Installation Mistakes to Avoid
Most avoidable problems come from forcing alignment, losing track of original hardware, or completing the installation before fitment and clearances have been checked.
Overtightening or Using the Wrong Hardware
Use the specified fastener, washer, grommet, and torque for each location. Excessive force can crack plastic around a mounting point, while the wrong bolt length or shoulder can damage a bracket or leave the panel loose.
Assuming Heat Protection Is Universal
Heat exposure varies by model, exhaust system, and panel location. Reinstall the protection specified for the motorcycle, maintain the required exhaust clearance, and inspect after the first heat cycles. Stop if you notice discoloration, odor, softening, or contact with a hot component.
Modifying Panels Before the Full Dry-Fit
Start all compatible fasteners and verify the entire panel set before trimming, drilling, or tightening. Early modification can hide a wrong SKU, a damaged stay, or an installation-order problem and may make a return impossible.
Patience during the dry-fit is more valuable than forcing a seam to close. If a panel remains misaligned, compare both sides of the bike, inspect the mounting structure, and contact the seller before changing the part.
Frequently Asked Questions
Do Amotopart Suzuki GSX-R fairings fit exactly like OEM panels?
No aftermarket kit should be assumed to fit exactly like an original Suzuki panel. Amotopart product pages may describe ABS construction and pre-drilled holes, but you still need to match the exact SKU to the motorcycle and complete a dry-fit. Misalignment can come from the kit, incorrect installation, or bent motorcycle hardware, so identify the cause before modifying anything.
What is included in an Amotopart pre-painted fairing set?
Contents vary by SKU. Confirm the panel list, windscreen, heat material, inner trim, fasteners, grommets, and bolt kit on the exact product page and order confirmation. Photograph the unopened package and contact support promptly if anything is missing or damaged.
Can I customize the colors or graphics?
Amotopart advertises fairing customization, but the scope and conditions should be confirmed before production. Approve the final design in writing and verify color expectations, decals, lead time, price, cancellation terms, and return eligibility.
How should I protect the lower fairings from heat?
Follow the model-specific service information and the kit instructions. Retain or replace the specified OEM heat barriers, verify clearance from the exhaust, and use included heat material only where the instructions require it. Reinspect the panels after the first heat cycles.
For current information about orders, shipping, returns, or support, visit the Amotopart FAQ page and review the Return & Refund Policy before ordering.
Final Buying Checklist
A useful Suzuki GSX-R fairing kit is one that matches the exact motorcycle, states its material and finish clearly, lists every included part, and arrives with enough documentation to inspect and dry-fit it before modification.
Start with the Amotopart Suzuki fairings collection, open the exact model-year product page, and request written confirmation for fitment, customization, package contents, production time, and return conditions. During installation, follow the correct Suzuki service information and do not ride until lights, steering clearance, fasteners, heat protection, and bodywork security have all been checked.