TL;DR
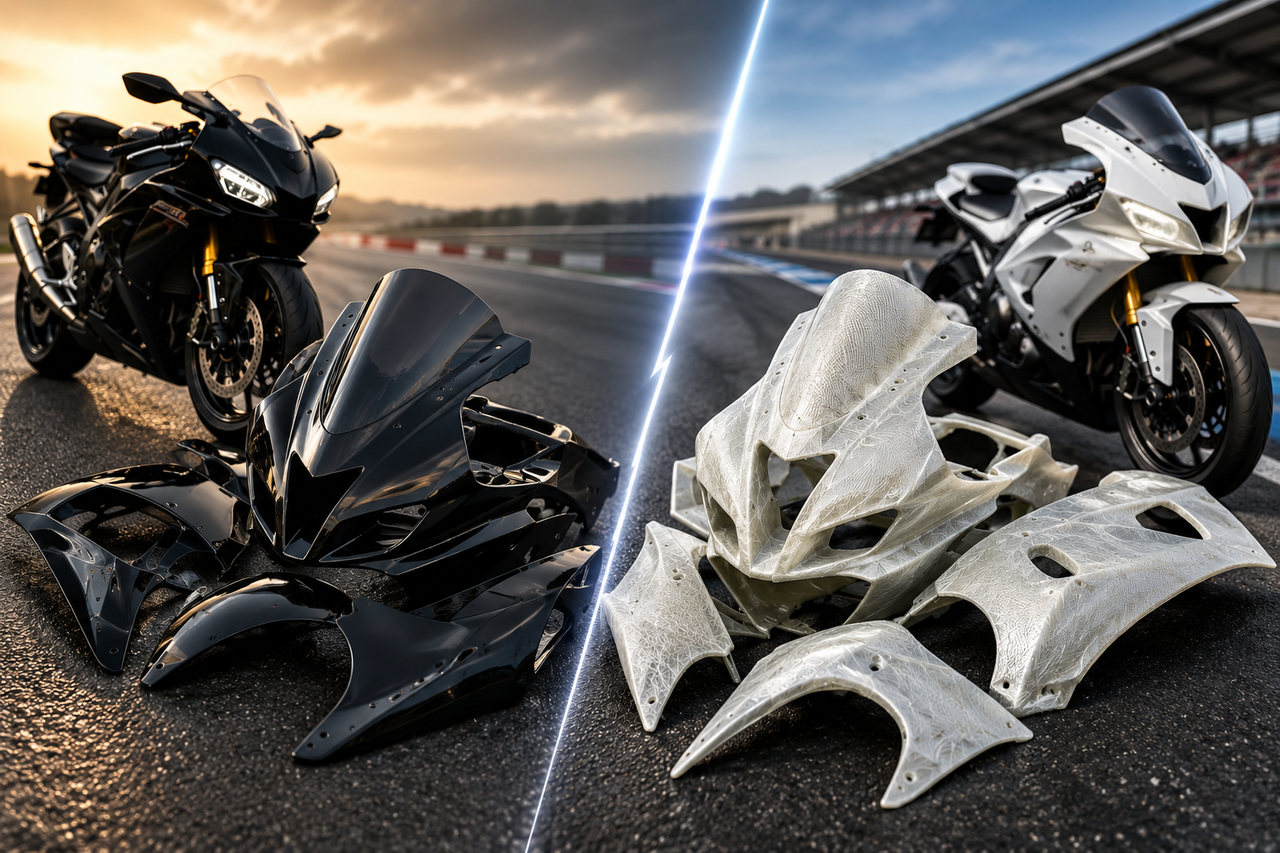
Pre-painted motorcycle fairings are usually the easier restoration route when a compatible design is available and the goal is to return the bike to service without managing a separate paint project. They remove surface finishing, color application, graphics, clear coat, and paint curing from the buyer's workflow.
Unpainted fairings are the better starting point when the project requires a specific paint system, exact coordination with other repaired panels, a one-off livery, or professional body-shop work. The choice of finish does not guarantee fitment: both painted and unpainted panels must be confirmed for the exact model and year, inspected, and dry-fitted before final installation.
Key Takeaways
-
Choose pre-painted fairings for convenience when an available design meets the project brief.
-
Choose unpainted fairings when custom paint control matters more than turnaround simplicity.
-
Do not rely on universal installation or painting times; motorcycle condition, kit complexity, paint system, and skill level change the schedule.
-
Dry-fit unpainted panels before paint so trimming or hole adjustments do not damage a finished coating.
-
Compare total project cost, including preparation, paint, safety equipment, hardware, shipping, and labor.
-
Use the coating manufacturer's technical data sheet and safety data sheet rather than a generic sanding, flash-time, or curing recipe.
Painted vs. Unpainted Fairings at a Glance
|
Decision factor
|
Pre-painted fairings
|
Unpainted fairings
|
|
Best fit
|
Fastest path when a compatible design is already available
|
Custom color, professional paint match, race livery, or restoration with a defined coating system
|
|
Work removed
|
Surface finishing, color, graphics, clear coat, and curing are handled before delivery
|
No finishing work is removed; preparation depends on the substrate and coating system
|
|
Fitment
|
Must still be verified and dry-fitted
|
Must be dry-fitted before paint
|
|
Finish control
|
Limited to listed or approved custom designs
|
Full control within the painter's materials, equipment, and skill
|
|
Damage risk during installation
|
Finished paint can be scratched or chipped
|
Fitment corrections can be completed before final paint
|
|
Cost comparison
|
Kit price plus shipping, hardware, and installation
|
Blank panels plus preparation, coatings, graphics, safety controls, and labor
|
|
Schedule
|
Depends on stock, customization, shipping, inspection, and installation
|
Depends on fitment work, coating steps, flash times, curing, and rework
|
The Direct Answer: Which Is Easier?
Pre-painted fairings are easier when "easy" means fewer project stages. The buyer receives finished panels and can focus on inspection, component transfer, alignment, and installation. This avoids sourcing a compatible primer, base coat, graphics, and clear coat, as well as creating a controlled painting environment.
That does not make a pre-painted kit effortless to install in every case. Bent brackets, worn grommets, previous repairs, non-stock lights, exhaust changes, or normal manufacturing tolerances can affect alignment. Installation time can range widely, so a responsible guide should not promise that every full kit can be installed in one afternoon.
Unpainted panels add a finishing project, but that extra work can be useful. A restorer can correct panel edges and mounting points before paint, coordinate the color with the fuel tank and repaired parts, and choose a complete coating system for the intended environment.
When Pre-Painted Fairings Make More Sense
Pre-painted fairings are generally a strong choice for:
-
Replacing several scratched, faded, or damaged street-bike panels.
-
Restoring a motorcycle when an available color scheme already meets the goal.
-
Owners without a suitable paint workspace or a trusted professional painter.
-
Projects where predictable design approval matters more than exact local paint formulation.
-
Bikes whose original bodywork will be stored while a replacement set is used.
The main trade-off is that the finish already exists. Any drilling, trimming, forced alignment, or dropped tool can damage it. A new finish may also look different beside an older fuel tank or adjacent OEM component that has faded, been polished, or previously repaired.
Before ordering, verify:
-
The exact motorcycle model, model year, and variant.
-
Whether the design is stock, made to order, or customized.
-
Which panels, windscreen, hardware, heat protection, and trim are included.
-
Whether finished photos will be provided before shipment.
-
How a fitment, paint, or shipping issue is documented and resolved.
When Unpainted Fairings Are the Better Starting Point
Unpainted fairings are usually better for:
-
A one-off livery or color unavailable as a finished kit.
-
A professional repair where the painter will coordinate the new panels with existing bodywork.
-
A race motorcycle whose graphics, sponsor layout, or finish changes regularly.
-
A project that needs trimming, drilling, filling, or reinforcement before paint.
-
A builder who already has the correct workspace, equipment, materials, and training.
Unpainted does not necessarily mean ready for primer. The surface may have handling marks, mold-release contamination, scratches, pinholes, or other defects that must be assessed. The panel substrate and the chosen paint system determine the correct cleaning, abrasion, adhesion promoter, primer, base-coat, and clear-coat process.
Dry-Fit Before Painting
The most important workflow rule for unpainted bodywork is simple: complete the fitment work first. Painting a panel before verifying its mounting points creates avoidable rework.
-
Inspect the motorcycle. Check the fairing stay, subframe, brackets, grommets, lights, and previous repairs.
-
Inventory the kit. Compare all panels and accessories with the product listing.
-
Transfer temporary components. Install the mounts, clips, ducts, vents, and other pieces needed to evaluate alignment.
-
Assemble the full set loosely. Start fasteners by hand and check panel interfaces before tightening.
-
Complete permitted corrections. Resolve trimming, hole, tab, and edge issues before surface finishing.
-
Mark panel relationships. Record graphic alignment points and areas hidden by adjacent panels.
-
Remove and prepare for paint. Keep transferred hardware organized for final assembly.
A pre-drilled hole reduces work, but it does not prove perfect fitment. Previous modifications, a bent bracket, or a missing rubber mount can shift the entire assembly.
A Safer Unpainted-Fairing Workflow
There is no universal paint recipe for motorcycle fairings. Sandpaper grade, cleaner, adhesion promoter, primer, flash time, film thickness, curing temperature, and handling time must come from the selected coating manufacturer's technical data sheet. Safety precautions must come from the corresponding safety data sheet.
A responsible high-level process is:
-
Identify the substrate and coating system. Confirm that the cleaner, preparation products, primer, color, graphics, and clear coat are compatible.
-
Clean according to the product instructions. Remove contamination without using a solvent that attacks the plastic.
-
Repair and level defects. Address scratches, pinholes, edges, and permitted fitment corrections before final surface preparation.
-
Prepare the surface. Follow the coating system's specified abrasion and adhesion process.
-
Apply primer and color within the stated windows. Respect the specified flash time, temperature, humidity, and film build.
-
Apply graphics and clear coat as a compatible system. Do not assume every decal, paint, and clear coat can be combined.
-
Allow full cure before assembly. Dry-to-touch is not necessarily ready for handling, fastening, fuel exposure, or road debris.
Spray-Painting Safety
Automotive refinishing is not a casual indoor DIY activity. Paint spray can contain hazardous solvents, particles, metals, or polyisocyanates, depending on the product. The U.S. National Institute for Occupational Safety and Health notes that controlling paint overspray requires suitable spray equipment, a properly designed and ventilated booth, personal protective equipment, training, and equipment maintenance. Review the NIOSH guidance on paint overspray and every product's SDS before deciding whether the work can be performed safely.
If the required controls, training, or protective equipment are unavailable, use a qualified refinishing professional. A dust mask or an open garage door should not be treated as a substitute for the controls specified by the coating manufacturer and applicable workplace rules.
Compare the Total Project Cost
Unpainted panels often have a lower purchase price, but that does not establish the lower completed cost. Pre-painted kits include finishing work in the product price; unpainted kits move that work to the owner or paint shop.
Compare written totals for:
-
The bodywork set and all model-specific pieces.
-
Windscreen, bolts, clips, grommets, brackets, and heat shielding.
-
Cleaning, repair, abrasion, primer, color, graphics, and clear coat.
-
Spray equipment, booth access, environmental controls, and safety equipment.
-
Professional fitment, paint, or installation labor.
-
Shipping, tax, duties, and project lead time.
-
Rework risk and the availability of individual replacement panels.
There is no reliable universal ratio for which option costs less. A simple single-color professional job can have a different budget from a multi-color race replica, and a builder who already owns approved equipment faces a different cost from a first-time painter.
What Amotopart Currently Documents
Amotopart's official FAQ documents several points relevant to this decision:
-
Its fairings are made from ABS plastic and pre-drilled according to OEM specifications.
-
Minor installation adjustments can be normal when a motorcycle has model variations or previous modifications.
-
The individual product page identifies compatible models and years; buyers can provide a VIN or original-part photo when uncertain.
-
Complete fairing kits include the main panels, with a bolt kit, windscreen, and heat shield supplied at no added charge.
-
Standard color, logo, pattern, and graphic changes can be requested, while complex designs may add cost.
-
Finished-product photos are provided for approval before shipment.
Amotopart also lists unpainted products, such as its Yamaha YZF-R6 unpainted fairing kit, whose page states that paint and custom painting are not included. Availability varies by motorcycle, so confirm whether the exact model is offered painted, unpainted, or both.
These documented facts support a fitment and finish decision. They do not establish a universal manufacturing method, zero-adjustment installation, or a fixed completion time for every motorcycle.
Which Option Fits Your Project?
Daily rider after cosmetic damage: A compatible pre-painted kit is often the simpler path when several panels need replacement. Inspect the brackets first so new bodywork is not forced around hidden crash damage.
Factory-color restoration: Compare the new finish with the age and condition of the fuel tank and remaining OEM pieces. A professional local color match may favor unpainted panels when exact coordination matters.
Custom show bike: Choose based on design-control needs. A supplier-approved custom pre-painted kit can remove paint work, while an unpainted kit gives the painter full control over the system and final assembly.
Track motorcycle: Unpainted bodywork can make sense when the kit needs drilling, quick-release hardware, sponsor graphics, or regular repair. Confirm that the bodywork type and finished motorcycle meet the relevant track or racing rules.
Resale project: Do not assume the fastest or cheapest finish creates the best return. Buyers may value clean fitment, documented repairs, accurate model-year compatibility, and honest disclosure more than a particular paint path.
Final Installation Checklist
-
Confirm the exact model, year, variant, and modifications.
-
Inspect brackets, grommets, mounting tabs, lighting, and previous repairs.
-
Verify every included panel and accessory.
-
Dry-fit the complete set before final paint or tightening.
-
Transfer vents, ducts, insulation, lamps, and other required components.
-
Install heat shielding and verify clearance from the exhaust and engine.
-
Start fasteners by hand and align all panels before tightening.
-
Use model-specific service information for hardware and torque requirements.
-
Test steering, controls, lights, mirrors, and tire clearance.
-
Reinspect fasteners and contact points after the first rides or heat cycles.
Frequently Asked Questions
Are pre-painted motorcycle fairings easier to install?
They remove the painting stage, but the physical installation is not automatically easier than the same panels in unpainted form. Fitment still depends on compatibility, panel geometry, brackets, hardware, previous repairs, and careful dry-fitting.
How long does it take to install pre-painted fairings?
There is no reliable universal time. Panel count, motorcycle design, installer experience, transferred parts, damaged brackets, and adjustments can change the job substantially. Plan around the exact motorcycle and kit rather than a fixed hour estimate.
Do unpainted fairings need sanding and primer?
They normally require surface preparation, but the exact process depends on the substrate and coating system. Follow the paint manufacturer's TDS and SDS; do not apply a generic sandpaper grade or primer recommendation to every panel.
Are Amotopart painted fairings ready to bolt on?
Amotopart says its fairings are ABS and pre-drilled to OEM specifications, but it also notes that minor adjustments can be normal. Inspect the finish, verify compatibility, inventory the kit, and dry-fit all panels before final tightening.
Is an unpainted kit always cheaper?
No. Compare the completed project cost, including preparation, paint, graphics, clear coat, safety controls, labor, and possible rework. Unpainted bodywork is economical when the builder already has the necessary resources or specifically needs custom paint control.
Can I paint motorcycle fairings in a home garage?
Only when the selected coating system's ventilation, environmental, fire-safety, exposure-control, and protective-equipment requirements can be met. Read the TDS and SDS. Use a professional refinisher when those controls are unavailable.
Final Recommendation
Choose pre-painted fairings when a compatible design meets the brief and the priority is eliminating the finishing stage. Choose unpainted fairings when exact paint control, pre-paint fitment work, or a unique professional finish matters more than project simplicity.
Whichever route you choose, treat model compatibility and motorcycle condition as separate from paint status. Verify the product page, inspect the mounting structure, dry-fit the entire set, and compare total project cost. Riders evaluating available finishes can browse Amotopart's motorcycle fairing catalog and use its fitment process to confirm uncertain model details before ordering.