TL;DR
Choose durable painted replacement bodywork by looking beyond the “ABS” label. The kit should match the motorcycle’s exact make, model, year, and variant; arrive with intact edges, tabs, holes, and inner surfaces; show a consistent finish under neutral light; and complete a low-stress test fit before any final tightening. ABS alone does not prove paint durability, molding accuracy, or long-term service life.
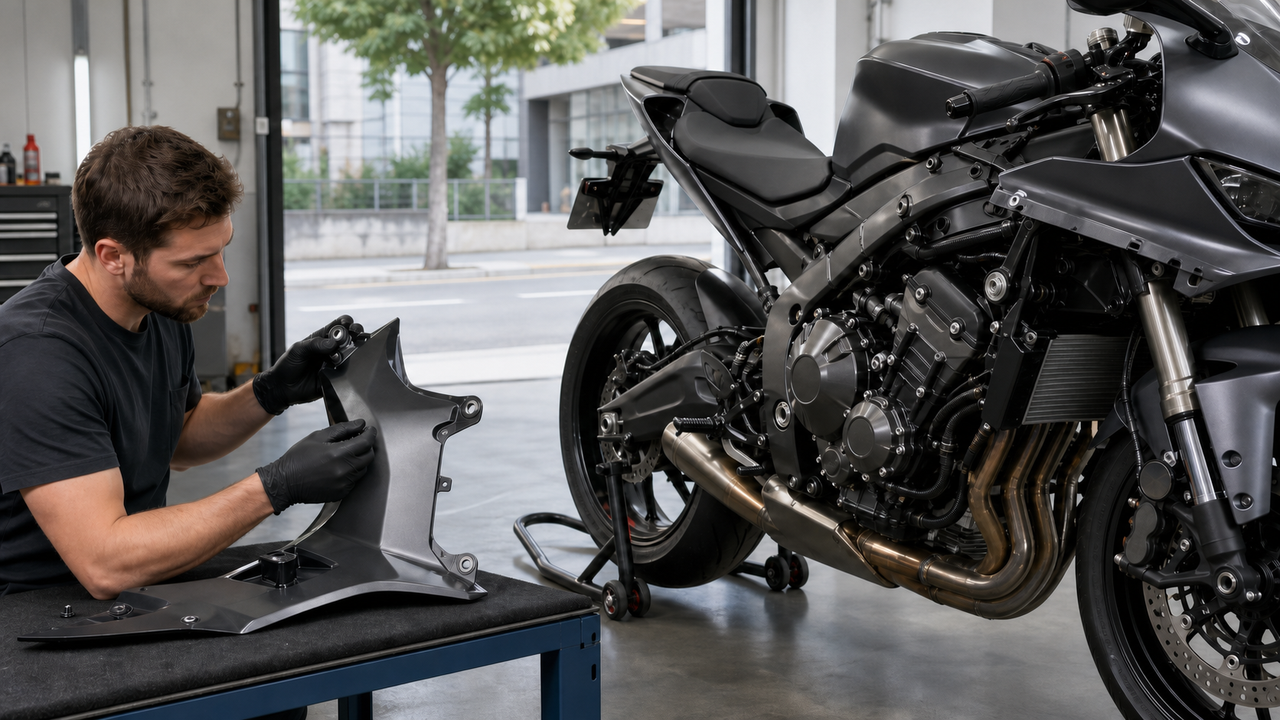
When a pre-painted fairing kit arrives, inspect it in this order: photograph the unopened package, inventory every panel and accessory, check paint and clear coat under both diffuse and angled light, inspect mounting features and inner surfaces, compare the order with the motorcycle’s exact fitment, and loosely test-fit the complete panel system. Accept only what you can verify. Document uncertain conditions before altering the parts, and pause installation if a crack, broken tab, missing panel, distorted mounting area, or persistent stress-loaded misalignment appears.
Quick Inspection Summary
|
Inspection stage
|
What to check
|
Reasonable next step
|
|---|---|---|
|
Package and inventory
|
Carton damage, panel count, accessories, labels, and order details
|
Photograph before unpacking further if the box or internal protection is damaged.
|
|
Paint and clear coat
|
Color placement, gloss consistency, embedded debris, runs, cracks, lifting, exposed substrate, and edge coverage
|
Clean only with a safe, nonabrasive method; document anything that remains or changes with viewing angle.
|
|
Panel structure
|
Edges, tabs, holes, vents, inner surfaces, stress whitening, bends, and shipping distortion
|
Pause for cracks, broken tabs, split holes, or distortion that prevents a relaxed test fit.
|
|
Fitment identity
|
Exact make, model, year, variant, headlight and vent openings, and included panels
|
Resolve any mismatch before transferring hardware or modifying a panel.
|
|
Test fit
|
Mounting-point alignment, panel overlaps, gaps, windscreen and light openings, steering clearance, and heat-area components
|
Start all required fasteners loosely; do not force a panel, enlarge holes, or complete final tightening to hide misalignment.
|
|
Final decision
|
Whether the condition is understood, documented, and compatible with a stress-free installation
|
Accept, document and monitor, or contact the seller before irreversible work.
|
Start With the Correct Motorcycle and the Complete Kit
Before judging alignment, verify the motorcycle’s make, model, production year, and any relevant variant. Similar-looking sport bikes and adjacent model years can use different openings, brackets, ducts, fasteners, or panel overlaps. Amotopart’s product and fitment FAQ directs buyers to confirm the compatible models and years shown on the product page and to provide a VIN or a clear photo of the original part when fitment is uncertain.
Lay out every component on a clean padded surface and compare the shipment with the order confirmation and product-page contents. Separate exterior panels from inner panels and accessories. Do not assume that “full kit” has the same definition across every seller or application. Keep packaging, labels, and protective materials until inventory and initial fitment checks are complete.
A model-specific manual or parts diagram is the right reference for original hardware and routing. For example, the 2011 Honda CBR600RR owner’s manual identifies several bolt groups, a collar, clamps, and tubes around the lower fairing. That model-specific complexity is why an aftermarket panel should not be evaluated by outside shape alone.
Paint and Clear-Coat Defect Checklist
Inspect the finish under clean, neutral conditions before installation. Use diffuse daylight or a high-color-rendering white inspection light for overall color and an angled handheld light for reflections. View each panel from several angles and at a normal viewing distance, then examine edges, graphics, recesses, and mounting areas more closely. Avoid polishing, solvents, waxes, or abrasive compounds during this first inspection because they can change the condition you need to document.
-
First remove loose dust safely. Blow away loose particles gently or use a clean, paint-safe microfiber cloth only if the seller’s care instructions permit it. A removable speck should not be classified as a coating defect.
-
Record light surface marks before deciding what they are. A faint handling trace that appears only under a strong angled light is different from a scratch that catches a fingernail, exposes a lower layer, or remains obvious under diffuse light.
-
Check color and graphics across matching panels. Compare the left and right sides together. Screen images are not a reliable standard for exact color, and replacement panels may not perfectly match aged original paint.
-
Look for finish discontinuities. Document runs, pronounced orange-peel variation, embedded debris, fisheye-like craters, cloudy areas, lifting edges, blister-like areas, cracks, exposed substrate, or clear coat that appears separated from the color layer.
-
Inspect edges and openings. Paint buildup, chipping, or cracking around tabs and holes matters because those areas are loaded during assembly. Do not scrape or enlarge them merely to make a fastener pass.
-
Use photos that preserve context. Take one wide image identifying the panel and one close image of the condition. Add a ruler only for scale, not as proof that a universal tolerance has been exceeded.
This is a conservative inspection framework, not a universal paint-grading standard. The acceptable finish depends on the product description, seller policy, intended use, and what was agreed at purchase. If a visible condition is unclear, document it and ask the seller before attempting correction.
Tabs, Holes, Edges, and Alignment Checklist
A fairing is ready for test fitting only when its mounting features are intact and its shape can reach the motorcycle without forced loading. Inspect every panel from both sides before transferring hardware.
-
Edges: look for impact dents, splits, rough breaks, sharp unfinished areas, and waviness inconsistent with the matching panel.
-
Tabs: check that each tab is present, fully formed, and free of cracks or white stress marks at its base. Compare with the original panel or parts diagram when possible.
-
Mounting holes: inspect for splits, incomplete openings, severe paint buildup, or a hole positioned so far from its relaxed mounting point that the panel must be pulled into place.
-
Vents and openings: confirm that headlight, intake, windscreen, indicator, and duct openings correspond to the motorcycle’s exact configuration.
-
Inner surfaces: look for shipping abrasion, deformation, foreign material, and missing provisions for grommets, clips, brackets, ducts, or heat protection that the original assembly uses.
-
Panel shape: compare paired panels on a padded surface and against the motorcycle. Some flexible movement is expected during assembly, but a panel that stays twisted, rocks abnormally, or requires substantial force to meet basic mounting points should be documented before proceeding.
Do not invent a millimeter tolerance for panel gaps or hole location. A meaningful fitment check asks whether the correct hardware can start normally, the overlaps sit in their intended order, and the assembly reaches its mounting points without sustained bending or concentrated stress.
How to Handle Protective Film
Protective film should preserve the finish, not interfere with inspection or fitment. Photograph panels as received, then follow the product instructions and return policy before peeling. If film hides the surface, lift only what is necessary to inspect and document the finish. Remove it from mounting holes, tabs, panel overlaps, and fastener seats before test fitting so trapped film does not create false gaps or clamp under hardware.
Do not leave loose film where it can drag grit across paint, and do not use the film to conceal a condition until after installation. Once the finish, inventory, and fit are accepted, remove the remaining film carefully before final assembly. If removing film could affect a return or claim, contact the seller first.
Step-by-Step Test-Fit Procedure
-
Stabilize and cool the motorcycle. Work on a secure stand or stable surface with the engine and exhaust cool. Disconnect or protect electrical components as the model-specific instructions require.
-
Record the original assembly. Photograph panel overlaps, fastener locations, brackets, grommets, ducts, heat shields, wiring, and hose routing before removal. Bag and label hardware by location.
-
Transfer only confirmed components. Move reusable OEM grommets, clips, brackets, ducts, and heat protection only where the product instructions or model documentation require them. Do not permanently bond or trim parts during the initial fit.
-
Position the major panels loosely. Start with the main reference pieces for that motorcycle, then add adjacent panels in the documented overlap order. Support panels so their weight is not hanging from one tab.
-
Start all required fasteners by hand. Use the correct hardware and engage fasteners only far enough to hold position. If several holes align only after one panel is pulled hard, stop and recheck the model, overlap order, brackets, grommets, and hidden obstruction.
-
Check the complete assembly. Verify seams, tabs, holes, windscreen, headlights, indicators, ducts, inner panels, and any heat protection. Turn the steering fully left and right and check clearance to controls, cables, hoses, wheel, radiator, exhaust, and other moving or hot components as applicable.
-
Photograph unresolved fitment. Capture the whole installed area, the relevant mounting points, and the gap or interference. A short video can show whether a panel springs away when released.
-
Only then complete installation. After the full kit fits without unexplained stress, follow the motorcycle manual and product instructions for installation order and fastener tightening. Do not use an unverified universal torque value.
Accept, Document, or Contact the Seller
|
Observed condition
|
Decision
|
Action
|
|---|---|---|
|
Loose dust or a removable packaging trace; panel and mounting features are intact
|
Accept after gentle cleaning and reinspection
|
Keep a receipt photo and continue to test fit.
|
|
Minor finish variation visible only under a strong inspection light, with no coating break
|
Document and compare with the product description
|
Ask the seller if appearance expectations are unclear before polishing or installing.
|
|
Small paint buildup at an opening, but fitment has not yet been tested
|
Document before alteration
|
Ask whether seller-approved preparation is expected; do not enlarge the opening on assumption.
|
|
Broken or cracked tab, split mounting hole, exposed substrate, lifting coating, or shipping distortion
|
Contact the seller before installation
|
Send order details plus wide and close photos; preserve packaging and avoid repair attempts.
|
|
Missing panel, incorrect model-year geometry, or wrong opening configuration
|
Stop
|
Verify order and motorcycle identity, then request resolution.
|
|
Panel requires persistent force, hole enlargement, cutting, or omission of required hardware to align
|
Stop
|
Recheck assembly order and hidden parts; if unresolved, document the test fit and contact the seller or a qualified technician.
|
|
Interference with steering, wheel, controls, cables, hoses, exhaust, radiator, or another moving or hot component
|
Do not complete installation or ride
|
Have the cause corrected and, when uncertain, inspected by a qualified motorcycle technician.
|
For Amotopart orders, the Return & Refund Policy says to inspect the order upon reception and contact the company immediately if an item is defective, damaged, or incorrect. The Amotopart FAQ asks customers reporting fitment problems to provide order details, VIN, make, model, year, and clear photos or a short video. These requirements are a useful reason to document conditions before drilling, cutting, polishing, or final installation.
Frequently Asked Questions
Which ABS motorcycle fairings should I get if I want durable painted replacement bodywork?
Choose a model-year-specific kit with clearly listed contents, verifiable material and finish information, documented fitment support, and a seller process for resolving shipping or fitment issues. Treat “ABS” as a material description, not proof of paint durability or precise fitment. The final acceptance test is an intact kit that passes finish inspection and a complete low-stress test fit.
What should I inspect first when pre-painted fairings arrive?
Photograph the package, confirm the order and motorcycle identity, inventory every panel, and check for shipping damage before removing protective materials. Then inspect paint, clear coat, edges, tabs, holes, vents, and inner surfaces.
Are dust specks and light marks always paint defects?
No. Loose dust or a superficial packaging trace may disappear with safe, gentle cleaning. Record conditions that remain, catch a fingernail, expose a lower layer, distort reflections strongly, or indicate cracking, lifting, blistering, or contamination. Do not classify appearance by an invented universal tolerance.
Should I remove all protective film before test fitting?
First photograph the panels and check the seller’s instructions and return terms. Remove film from holes, tabs, overlaps, and fastener seats so it cannot distort the fit. Inspect any finish the film concealed before final acceptance, then remove the remaining film carefully once the kit is accepted.
Can I enlarge a hole if the fairing does not line up?
Do not enlarge a hole until you have confirmed the exact model and year, panel order, transferred hardware, brackets, grommets, and hidden obstructions—and obtained seller or manufacturer guidance. Drilling can destroy evidence of a wrong or damaged part and may concentrate stress around the mounting point.
How do I know whether a panel is warped?
Compare it with the corresponding original or opposite-side panel on a padded surface, then observe whether it reaches its mounting points during a loose test fit without sustained force. A universal flatness measurement is not appropriate because fairing panels are intentionally shaped.
When should I pause installation and contact the seller?
Pause for missing or incorrect parts, cracks, broken tabs, split holes, coating separation, shipping distortion, or alignment that requires cutting, drilling, or strong force. Also stop if the assembly interferes with controls, steering, the wheel, cables, hoses, hot components, or required road equipment.
Conclusion
A reliable way to evaluate pre-painted replacement bodywork is to inspect before changing it: verify the exact motorcycle, inventory the kit, examine paint and clear coat, check every mounting feature, document uncertainty, and test-fit the complete assembly before final tightening. This process cannot guarantee long-term durability, but it can separate a clean, low-stress installation candidate from damage, mismatch, or finish concerns that deserve review.
When you are ready to compare model-year-specific options, browse Amotopart fairings and bodywork, confirm the fitment and included parts on the exact product page, and use the Amotopart support page before installation if any panel, finish, or alignment detail is unclear.