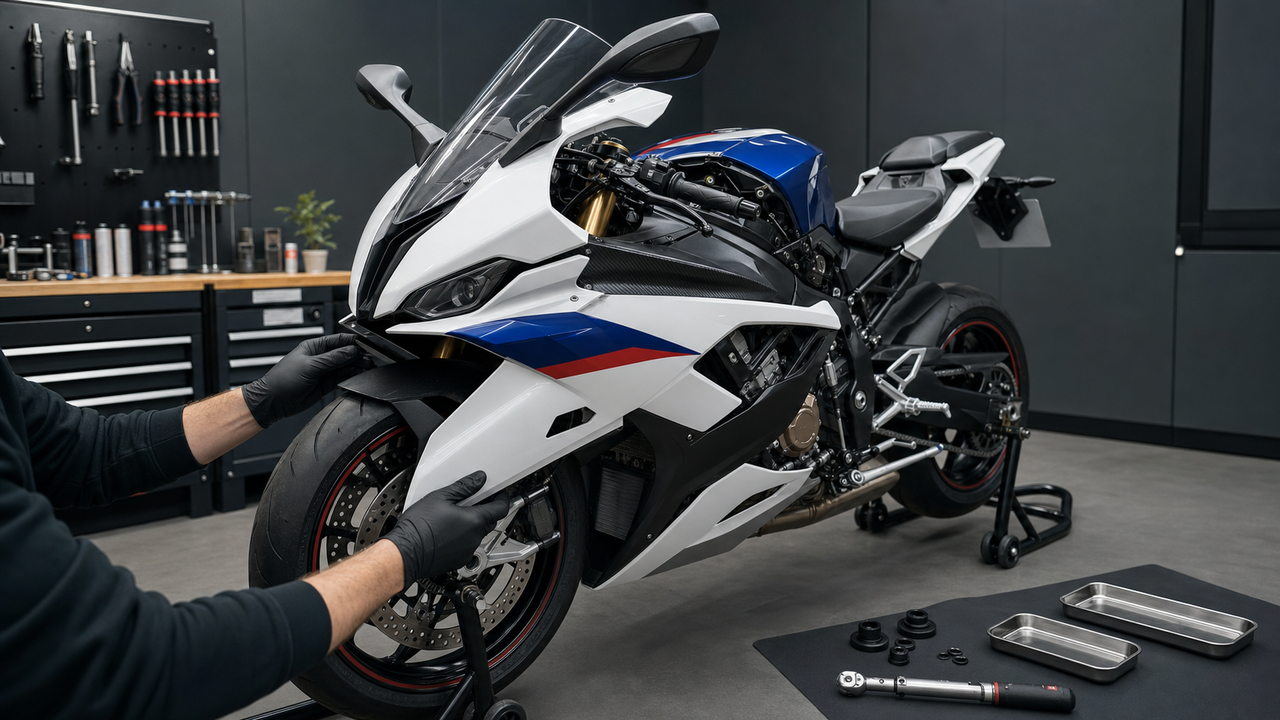
It only takes a split second—a minor garage tip-over, a low-speed slide, or a tight parking squeeze—for a motorcycle's protruding turn signal to snap off. When this happens, riders are faced with a dual challenge: not only must they replace the broken indicator, but they must also evaluate whether the impact damaged the surrounding fairing panel. As of July 2026, modern motorcycle designs and aftermarket fairing configurations offer several replacement paths, but choosing the wrong setup can lead to loose mounts, electrical hyperflashing, or road-legality issues.
Replacing damaged turn signals on motorcycle fairings requires evaluating both structural fairing integrity and electrical compatibility (especially LED upgrades), balancing aerodynamic flush-mounts against highly visible flexible stalks. To make the right decision, riders must systematically assess the physical damage to the fairing mounting point, select an indicator style that matches their riding environment, and address the specific wiring requirements of modern LED systems.
The Direct Answer: Which Motorcycle Turn Signals Should You Buy for Damaged Indicators?
After a minor drop or a garage tip-over, one of the most common casualties is the motorcycle's turn signal. Whether you are dealing with a snapped plastic stem or a cracked fairing mount, choosing the right replacement indicator depends heavily on your riding style, aesthetic preferences, and how your bike's fairings are configured.
To make an immediate decision, you should match the indicator design to your primary riding environment:
-
For Sportbikes and Track Riding: Consider flush-mount indicators. They sit close to the fairing surface, reducing exposure compared with a long stalk while preserving a clean profile. Verify that the selected unit provides suitable visibility and is permitted for the intended use.
-
For Commuters and Adventure Riders: Choose flexible rubber stalk indicators. These feature a pliable rubber joint that bends during minor impacts, protecting both the indicator and the fairing from structural damage.
-
For Factory Restorations: Choose standard OEM-style rigid stalks to maintain the motorcycle's original silhouette, though they remain vulnerable to impact.
Quick-Reference Comparison: Indicator Styles at a Glance
-
Flush Mount: High aerodynamic efficiency; lower exposure to snagging or impact than a protruding stalk; lower side visibility; requires specific fairing cutouts.
-
Flexible Stalk: Bends under some impacts; can provide strong multi-angle visibility; protrudes from the body; fitment varies by motorcycle and adapter.
-
Standard Rigid Stalk: Traditional factory-style profile; visibility depends on the lamp and mounting position; more exposed during a tip-over; fitment varies by motorcycle.
When replacing a damaged indicator, also inspect the mounting surface. A cracked or deformed panel can allow vibration or further damage. If replacement bodywork is needed, Amotopart lists model- and year-specific fairings; confirm the exact listing, mounting provisions, and any required adjustments before ordering. Indicator fitment and wiring must be verified separately.
Before purchasing new indicators, however, the first step is to evaluate whether your existing bodywork can actually support them.
Evaluating the Damage: Can Your Fairing Support a New Indicator?
Before bolting a new indicator onto your motorcycle, you must perform a critical diagnostic step: evaluating the structural health of the fairing itself. During a tip-over or low-side slide, the turn signal often acts as a lever, transferring the force of the impact directly into the surrounding plastic. Installing a new indicator on a compromised mounting point is a recipe for premature failure.
How to Inspect the Mounting Area
To conduct a thorough inspection, you will need to access both the exterior and interior surfaces of the fairing panel.
-
Clean the Surface: Road grime, dust, and chain fling can easily mask structural damage. Wipe down the area around the mounting hole thoroughly with a mild plastic-safe degreaser.
-
Identify Stress Fractures: Look closely for spiderweb-like hairline cracks radiating outward from the mounting hole. On painted ABS plastic, these often appear as faint white lines where the material has stretched and fatigued.
-
Examine the Backing Boss: Inspect the backside of the panel. Many fairings feature a molded collar or "boss" that reinforces the mounting hole. If this collar is cracked, sheared, or partially separated from the main panel, the fairing can no longer distribute physical loads properly.
Repair vs. Replacement: Making the Safe Decision
Deciding whether to repair or replace a damaged fairing panel depends entirely on the severity and location of the structural fatigue:
-
When Repair May Be Feasible: A small surface crack away from the mounting hole may be repairable after the plastic type and the full crack path are identified. Use a repair method compatible with the panel material, and have the result assessed by a qualified technician if the signal mount will carry load.
-
When Replacement or Professional Repair Is Recommended: If the mounting hole is split, or if the surrounding plastic has become thin and brittle, avoid relying on an unverified DIY reinforcement. At highway speeds, wind resistance exerts continuous aerodynamic drag on turn signals—especially stalk-style indicators. A weakened mounting point can easily fail under this aerodynamic load, causing the indicator to break free, dangle by its wiring, or detach entirely, posing a severe safety hazard.
If the mounting area cannot securely support the indicator, replace the panel or have it professionally repaired. Amotopart states that its fairings are pre-drilled to OEM specifications, while also noting that minor adjustment may be needed for model variations or previously modified motorcycles. Confirm the exact model and year on the product page before installation.
Once you have verified that your fairing is structurally sound—or have installed a secure replacement panel—you can confidently move on to choosing the indicator style that best matches your riding needs.
Design Tradeoffs: Flush Mount vs. Flexible Stalk Indicators
Once you have verified that your motorcycle's fairings are structurally sound, the next step is deciding which style of turn signal best suits your riding needs. The aftermarket landscape in 2026 primarily offers two distinct design configurations: flush-mount indicators and flexible stalk indicators. Choosing between them is not a matter of finding a universally ideal option, but rather balancing the practical tradeoffs of aerodynamics, physical durability, and road visibility.
Flush-Mount Indicators: Aerodynamics and Sleek Integration
Flush-mount indicators are designed to sit flat against the motorcycle's fairing, matching the bodywork's natural contours. This style is highly favored by sportbike riders for several key reasons:
-
Aerodynamic Efficiency: By eliminating the protruding "stalk" of OEM indicators, flush-mount designs reduce wind resistance and turbulence at high speeds.
-
Damage Prevention: Because they protrude less than stalk-style signals, flush-mount units are generally less exposed during a minor tip-over, although the lens, housing, wiring, and fairing mount can still be damaged.
-
Aesthetic Appeal: They provide a clean, streamlined, race-inspired look that integrates seamlessly with aftermarket fairings.
However, the primary tradeoff is visibility. Because flush-mount signals are recessed against the side fairings, their light output is highly directional. While they are highly visible from the side, they can be more difficult for oncoming traffic or vehicles directly behind you to spot, depending on the specific angle of your fairing panels.
Flexible Stalk Indicators: Maximum Visibility and Impact Resilience
For riders who prioritize safety and compliance, stalk indicators remain the standard. Fortunately, modern aftermarket designs have evolved beyond the rigid, brittle plastic stalks of the past. High-quality replacement options now feature flexible rubber joints at the base of the stalk.
-
Enhanced Visibility: Because they protrude outward from the fairing, stalk indicators can offer better multi-angle conspicuity than deeply recessed flush-mount units. Actual visibility depends on the lamp design, mounting position, fairing shape, and applicable lighting requirements.
-
Impact Response: A flexible rubber joint can allow the stalk to bend during some low-energy contacts, which may reduce the load transferred to the lamp housing and fairing mount. It does not make either component damage-proof.
Scenario-Based Guidance: Matching Your Riding Style
To determine which style to purchase, consider your primary riding environment:
-
The Sportbike Enthusiast: If you primarily ride on closed tracks, dry highway stretches, or want to clean up the lines of a sportbike after a minor fairing drop, flush-mount indicators provide a low-profile design that reduces exposure compared with a long stalk. Confirm that the chosen unit still provides adequate visibility for the intended use.
-
The Daily Commuter: If you navigate dense urban traffic, split lanes where legal, or ride frequently in poor weather, a flexible stalk design may offer useful separation and multi-angle visibility, provided the lamp and installation meet applicable requirements.
For riders replacing damaged bodywork, Amotopart lists model- and year-specific fairings and replacement parts. Confirm the compatible models and years on the product page, and separately verify the fitment, electrical compatibility, and road-use status of any replacement indicator.
Whichever design you choose, mounting the physical indicator is only half the task. Upgrading your lighting—especially when transitioning to modern LEDs—requires addressing the electrical compatibility of your motorcycle's wiring harness, which we will explore next.
Technical Compatibility: Wiring, Resistors, and Flasher Relays for LED Upgrades
When transitioning from selecting your indicator style to the physical installation, understanding the electrical differences between older OEM systems and modern aftermarket upgrades is critical. If you are replacing damaged factory-installed incandescent indicators with modern LED turn signals, you will likely encounter a common electrical phenomenon known as "hyperflashing."
The Physics of Hyperflashing
Many older motorcycles use incandescent indicators and thermal or load-sensitive flashers designed around the original lamps’ current draw. Lamp wattage and control logic vary by model, so the factory service manual is the correct reference for the original circuit.
LED indicators generally draw less current than comparable incandescent lamps. On a motorcycle with a load-sensitive flasher or lamp-monitoring circuit, that lower current draw can trigger hyperflashing, a warning, or another abnormal operating condition. Other motorcycles use electronic controls that may accept compatible LED indicators without additional components.
Correcting the Flash Rate: Resistors vs. Relays
If an LED conversion changes the flash rate or triggers a warning, use a vehicle-compatible remedy specified by the motorcycle or indicator manufacturer. Two common approaches are:
-
Inline Load Resistors: A correctly selected load resistor can be wired in parallel with an LED indicator to simulate part of the original lamp load. The required resistance and power rating are vehicle-specific; use the motorcycle wiring diagram and the signal manufacturer’s instructions rather than a universal value. Load resistors generate heat and must be mounted where that heat cannot damage plastic, insulation, or adjacent components.
-
LED-Compatible Flasher Relays: A cleaner, more efficient solution is replacing the OEM thermal flasher relay with an electronic, LED-compatible relay. Electronic relays use an integrated circuit to control the flash rate, ensuring a steady, consistent pulse regardless of whether the connected bulbs are incandescent, LED, or a combination of both. This plug-and-play solution eliminates the need to splice resistors into your wiring harness.
Implementation Caveat
Before purchasing replacement parts, remember that an LED conversion may require additional electrical components depending on the motorcycle’s original wiring and monitoring system. Confirm the factory lamp type, connector, polarity, and control method before choosing a resistor, relay, adapter, or coding solution.
With the electrical requirements clearly mapped out, you can proceed to the physical installation. The following section provides a step-by-step workflow for safely mounting and wiring your new indicators onto your fairings.
Step-by-Step Replacement Workflow: Installing Indicators on Fairings
Once you have selected the appropriate indicator style and gathered the necessary electrical components, such as inline resistors or an LED flasher relay, you can proceed with the physical installation. Replacing a turn signal on a motorcycle fairing is a straightforward DIY task, but it requires patience to avoid damaging delicate plastic bodywork or pinching wires.
Follow this structured workflow to ensure a secure, professional installation:
Step 1: Preparation and Safety
Before handling any electrical components, park your motorcycle on a stable, level surface using a rear stand or center stand.
-
Disconnect the Battery: Always disconnect the negative (-) battery terminal first to eliminate the risk of short circuits or blown fuses while splicing wires.
-
Remove Inner Fairing Panels: Depending on your motorcycle model, you will likely need to remove the inner fairing plastics or cockpit covers to gain clear access to the back of the turn signal mounting point and the OEM wiring harness. Keep track of all fairing bolts, plastic rivets, and washers by organizing them in a magnetic tray.
Step 2: Mounting the New Indicator
With the wiring exposed, disconnect the old indicator from the harness and unscrew its mounting nut to slide it out of the fairing.
-
Inspect the Mounting Area: Clean and inspect the opening, reinforcement features, and surrounding plastic. For replacement fairings, confirm the exact model and year, the location and shape of the pre-drilled opening, and whether the supplier notes any adjustment for prior modifications.
-
Position the Indicator: Insert the threaded shaft of the new stalk indicator (or the mounting base of a flush-mount indicator) through the fairing hole. If the mounting hole is larger than the aftermarket indicator shaft, use vehicle-specific spacer plates to prevent the indicator from shifting.
-
Secure the Hardware: Thread the washer and nut onto the shaft from the inside of the fairing. Tighten the nut until it is snug, but do not over-tighten. Excessive torque can easily crack the surrounding ABS plastic fairing panel.
Step 3: Wiring, Routing, and Testing
Proper wire management prevents electrical failures caused by vibration or heat.
-
Connect the Wiring: Connect the indicator wires to the motorcycle’s harness. Note: Wire color configurations vary significantly across manufacturers (for example, Honda, Yamaha, and Kawasaki use entirely different color schemes for ground and hot leads). Always consult your motorcycle's specific factory service manual to verify the wiring diagram before finalizing connections.
-
Route Wires Safely: Use zip ties to secure the wiring loom flat against the inner fairing structure. Ensure the wires are routed completely away from hot engine components, the radiator, and any moving parts like the front forks or steering triple clamps.
-
Perform a Function Test: Reconnect the battery and turn the ignition key to the "On" position. Test both the left and right turn signals, checking for the correct flash rate. If the lights flash too rapidly, double-check your resistor or flasher relay installation.
Once the system functions correctly, carefully reinstall the inner fairing panels. While a successful physical installation restores your bike's functionality, ensuring your new setup meets local road safety regulations is equally critical. Next, we will examine the specific legal and safety standards governing motorcycle lighting.
2026 State of Compliance: DOT Standards and Road Legality
Once your replacement turn signals are physically mounted and wired, verifying their legal compliance is the final, critical step before hitting the road. In July 2026, road safety standards remain highly stringent regarding motorcycle lighting. Ensuring your new indicators meet these guidelines is essential not only for passing state safety inspections but also for maintaining commuter safety and protecting yourself from liability in the event of an accident.
In the United States, new motorcycles and replacement lighting equipment are governed by Federal Motor Vehicle Safety Standard No. 108. State equipment, inspection, and use rules may add separate requirements, so verify both the federal equipment standard and the rules where the motorcycle will be operated.
-
Front Indicator Spacing: Must be mounted at least 16 inches apart (measured center-to-center between the lenses) to ensure oncoming traffic can clearly distinguish left from right.
-
Rear Indicator Spacing: Must be mounted at least 9 inches apart.
-
Visibility Angles: Indicators must be clearly visible from both the side and the rear/front, requiring unobstructed light projection across wide horizontal and vertical angles.
While flush-mount indicators offer excellent aerodynamics and a clean aesthetic, some compact aftermarket designs may not meet these strict spacing or visibility requirements, occasionally being designated "for off-road use only." Conversely, flexible stalk indicators generally make it easier to maintain the required DOT spacing and visibility angles.
Do not treat a “DOT” or “SAE” marking as blanket government approval of the entire installation. Manufacturers self-certify applicable lighting equipment, while the finished motorcycle must still meet required mounting, color, spacing, visibility, and operating conditions. Check the product documentation for intended road use, then consult the relevant state vehicle code or DMV guidance before riding.
With the structural, electrical, and legal requirements established, you are fully equipped to make an informed decision. To help clarify any remaining technical or installation details, let's address the most frequently asked questions regarding fairing-mounted indicator replacements.
Frequently Asked Questions
Which motorcycle turn signals should I buy for replacing damaged indicators?
The choice depends on the riding environment, fairing geometry, and applicable lighting rules. A flush-mount unit reduces protrusion but may provide less visibility from some angles. A flexible stalk can improve separation and multi-angle visibility while bending during some low-energy contacts. Compare model-year fitment, photometric or road-use documentation, connector and polarity, available clearance, and the condition of the fairing mount before buying.
How do I know if aftermarket turn signals will fit my motorcycle's fairings?
Turn-signal mounting dimensions are not universal. Confirm the motorcycle’s model and year, then measure the fairing opening, mounting footprint, thread or fastener type, connector, polarity, and available clearance behind the panel. If the replacement uses a different footprint, use a vehicle-specific adapter only when its manufacturer confirms compatibility; avoid drilling until the original mounting structure and all adapter options have been checked.
Do I need to replace my motorcycle fairing if the turn signal mounting hole is cracked?
A crack near the mounting hole requires material-specific assessment because the indicator can transmit vibration, wind load, and impact forces into the panel. A qualified repair may be possible when the plastic type and crack path are known; otherwise, replace the panel. Amotopart lists model- and year-specific replacement fairings, but confirm the exact listing, mounting provisions, and any required adjustments before installation.
What is the difference between flush-mount and stalk turn signals?
Flush-mount signals sit close to the fairing and reduce protrusion, but visibility can be limited by lens design and fairing angle. Stalk indicators extend farther from the body, which can improve separation and multi-angle visibility, but they are more exposed during a tip-over. Flexible joints may reduce impact load; they do not guarantee that the lamp or fairing will avoid damage.
Will aftermarket LED turn signals require a resistor?
An incandescent-to-LED conversion may require load compensation, an LED-compatible relay, coding, or no additional component at all, depending on how the motorcycle monitors its lighting circuit. Confirm the original lamp type and electrical architecture before purchasing parts. If the new signals hyperflash, remain illuminated, trigger a warning, or fail to operate, diagnose the circuit using the model-specific manual and the signal manufacturer’s instructions.
Conclusion
Replacing a damaged motorcycle turn signal involves more than plugging in a new light. A sound repair starts with confirming that the fairing mount is structurally secure, then choosing a signal whose visibility and fitment suit the motorcycle and intended use, and finally verifying the connector, polarity, control method, and flash behavior before reassembly.
Taking the time to match your replacement parts to both your riding style and your bike's technical specifications ensures a clean install that preserves both safety and aesthetics. If your post-drop inspection reveals a cracked fairing panel that cannot safely support a new indicator, or if you are looking for durable, compatible lighting upgrades, you can explore targeted replacement solutions at Amotopart to find the exact fit for your motorcycle model.