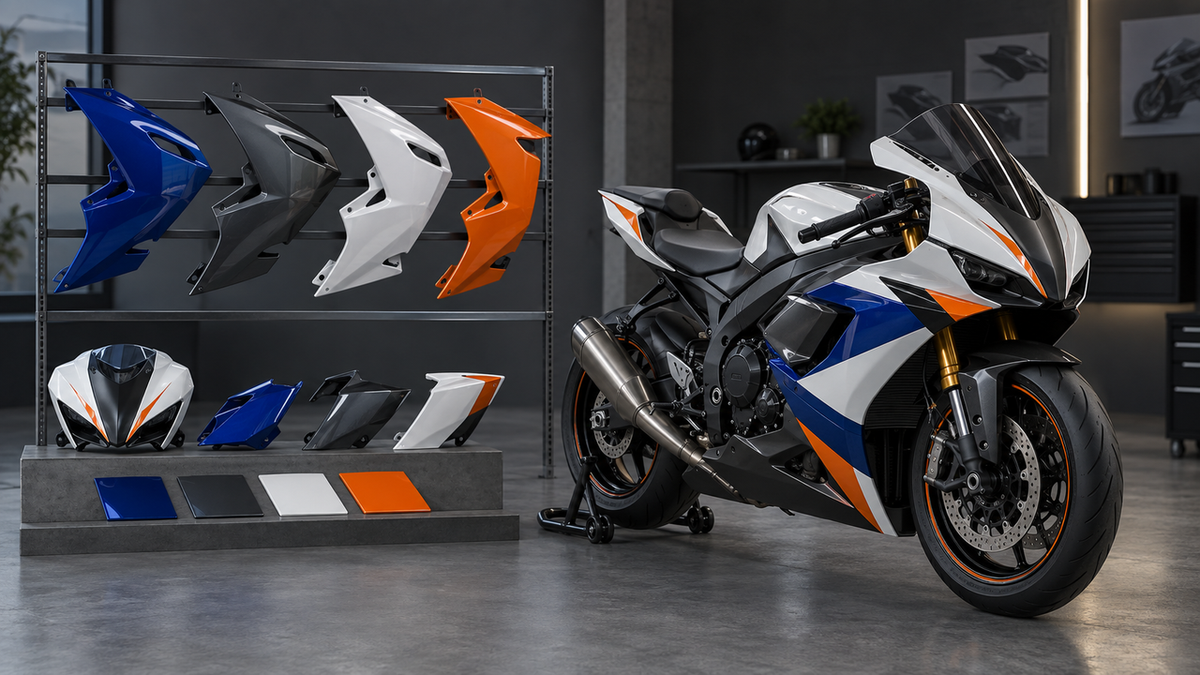
Direct Answer: The best Kawasaki fairings for a sport bike rebuild are the ones matched to the motorcycle’s exact model, production year, and bodywork generation, then selected around the real damage scope. Choose a model-specific complete painted kit when several panels are damaged, missing, or mismatched; choose a verified single replacement panel when damage is isolated; choose an unpainted or custom-finish kit when the rebuild includes a new color scheme. Before ordering, confirm mounting points and brackets are sound, check the exact package contents, and dry-fit every panel before final tightening.
Rebuilding a Kawasaki sport bike is not simply a matter of finding a fairing set that looks close. Two bikes with similar names or styling can use different panel shapes, mounting points, vents, headlight openings, and fastener locations. The smartest buying decision starts with identification and damage assessment, not color.
This guide gives riders a practical path for choosing replacement bodywork for Ninja and ZX-series rebuilds. It focuses on the questions that affect fit, finish, total project cost, and the likelihood of completing a clean rebuild without buying unnecessary parts.
What are the best Kawasaki fairings to buy for a sport bike rebuild?
The best choice is a model-specific fairing solution that matches the bike’s exact year range and rebuild scope. There is no single fairing set that is best for every Kawasaki. A complete kit is usually the stronger route when multiple panels are cracked, missing, faded, or painted in different schemes. A single panel can be more economical when only one piece is damaged and a compatible color match is acceptable.
|
Rebuild situation
|
Best starting route
|
Why it fits the project
|
|---|---|---|
|
Several damaged or mismatched panels
|
Model-specific complete painted kit
|
Creates a consistent finish and replaces the bodywork as a coordinated set.
|
|
One isolated damaged panel
|
Verified single replacement panel
|
Avoids replacing usable bodywork, provided fitment and color expectations are confirmed.
|
|
Full visual redesign
|
Custom-painted complete kit
|
Keeps the new graphics and finish consistent across the motorcycle.
|
|
Local paintwork already planned
|
Unpainted kit
|
Lets the rider’s chosen painter control preparation, color, and graphics.
|
|
Broken brackets or uncertain mounting points
|
Inspect and repair the underlying bike first
|
New outer panels cannot correct damaged supports, tabs, or misalignment underneath.
|
Start by checking the current Amotopart Kawasaki fairings and bodywork catalog, then verify every listing against the motorcycle rather than assuming that nearby years share the same bodywork.
Which Kawasaki model, year, and generation are you rebuilding?
Fitment begins with four facts: model family, exact model designation, production year, and market or bodywork variant. A listing that says “Ninja” is not specific enough. Ninja 400, Ninja 650, ZX-6R, ZX-10R, and ZX-14R are different platforms, and each family can contain multiple bodywork generations.
Use the registration or VIN record to confirm the year, then compare the original bodywork shape, headlight opening, air ducts, side-panel seams, tail layout, and mounting locations with the product photos. If a bike has already been modified or repaired, photos of the existing panels and mounting areas are especially useful. Amotopart’s fairing FAQ recommends checking model and year and providing a VIN or photo when compatibility is uncertain.
|
Kawasaki family
|
What to verify
|
Common buying mistake to avoid
|
|---|---|---|
|
Ninja 250 / 300 / 400 / 500
|
Exact displacement, production year, and original panel geometry
|
Assuming similar compact-Ninja styling means the panels interchange
|
|
Ninja 650 / ER-6F
|
Model name, year range, regional variant, headlight and side-panel design
|
Choosing by engine family while overlooking a body-generation change
|
|
ZX-6R / 636
|
Exact designation, generation, front-cowl shape, ducts, and tail layout
|
Buying for a visually similar year without comparing mounting details
|
|
ZX-10R
|
Generation, road configuration, and any track or lighting modifications
|
Assuming modified race-style bodywork uses the original road mounting pattern
|
|
ZX-14R / ZZR1400
|
Market name, year range, panel count, heat areas, and included trim pieces
|
Ordering a large kit without checking exactly which pieces are included
|
For a closer example of catalog filtering, review the dedicated Kawasaki Ninja 400 collection or Kawasaki Ninja 650 collection. These pages help narrow the search, but the individual product listing remains the source for the exact application and package.
Do you need one replacement panel or a complete fairing kit?
Count the affected pieces before shopping. Damage often extends beyond the most visible crack. Check the upper cowl, side panels, lowers, belly pan, front fender, tail sections, inner trim, and the joints between them. Also look for stress whitening, enlarged fastener holes, broken tabs, distorted edges, and old repairs.
A single panel is usually the better choice when:
-
Only one piece is damaged or missing.
-
The adjacent panels are straight, secure, and in good condition.
-
The available replacement is confirmed for the exact model and year.
-
A possible difference in paint age or shade is acceptable.
A complete kit is usually the better choice when:
-
Several panels are cracked, repaired, missing, or from different sets.
-
The rider wants one coordinated paint scheme across the whole bike.
-
Previous repairs have left uneven panel gaps or mixed hardware.
-
The total cost of sourcing, painting, and matching separate panels approaches the cost of a coordinated kit.
A complete kit does not automatically include every visible or mounting-related part. Read the SKU-level contents before checkout and make a separate list of reusable and missing hardware.
Should you choose painted, unpainted, or custom Kawasaki fairings?
The finish route should follow the project goal. A painted kit can simplify a full cosmetic reset because its panels arrive as one coordinated visual package. An unpainted kit makes sense when a local painter will control the preparation and finish. A custom scheme is useful when the rider wants a distinct design, but it requires a much clearer brief and approval process.
Painted fairings
Choose painted bodywork when you want a coordinated result without organizing separate paintwork. Confirm the photos, color description, gloss or matte finish, graphic placement, and exactly which panels receive paint. Do not assume that a newly painted replacement panel will be an exact visual match for older bodywork: age, sun exposure, previous repairs, display settings, and production processes can all affect perceived color.
Unpainted fairings
Choose unpainted bodywork when the rebuild already includes a trusted painter or when the finish needs to match other custom parts. Budget for surface preparation, primer, base coat, graphics, clear coat, and any test fitting requested by the painter. Ask the painter when they want the panels dry-fitted, because drilling, trimming, or adjustment should be resolved before final finishing whenever possible.
Custom-finish fairings
Choose a custom route when the bike’s new identity matters as much as replacing damaged plastic. The design brief should identify the bike, base color, secondary colors, finish level, graphic references, logo or artwork permissions, and areas where graphics must align across neighboring panels. Review design evidence and applicable policies before production rather than relying on a general description such as “Kawasaki green with racing graphics.”
For a step-by-step fitment and color brief, use the existing guide on ordering model-specific fairings in a custom color scheme.
What damage should be repaired before installing new fairings?
Fairings are outer body panels. They should not be treated as a way to correct structural or mounting problems underneath. Before buying, remove enough damaged bodywork to inspect the areas that locate and support the panels.
Check the following:
-
Fairing stays, subframes, brackets, and mounting ears for bends or cracks.
-
Headlight, mirror, windscreen, radiator, and duct mounts for movement or misalignment.
-
Rubber grommets, clips, well nuts, spacers, and fasteners for wear or absence.
-
Heat shields and hot areas near the exhaust or engine.
-
Wiring, hoses, and accessories that could be pinched by new panels.
-
Previous repairs, aftermarket lighting, frame sliders, or track modifications that changed the original mounting layout.
If the motorcycle has crash-related damage, uncertain alignment, or broken structural supports, have the underlying condition inspected and repaired by a competent professional before using new bodywork as a fitment test.
For a broader explanation of this boundary, see Can You Use Aftermarket Fairings to Rebuild a Crashed Sport Bike?
What should a complete Kawasaki fairing kit include?
A listing may describe the major outer panels as a complete kit, but package contents vary. Amotopart’s current FAQ says its full kits generally include the main fairing panels and may include a bolt kit, windscreen, and heat shielding; the exact product listing should be checked before purchase.
Confirm whether the selected SKU includes:
-
Upper or nose cowl
-
Left and right side panels
-
Lower fairings or belly pan
-
Tail sections and smaller trim pieces
-
Front fender
-
Windscreen
-
Fastener or bolt kit
-
Heat shielding
Then list everything the motorcycle still needs outside the package, such as brackets, grommets, clips, rubber well nuts, model-specific trim, lights, mirrors, or repaired mounting points. This prevents a “complete kit” label from becoming an incomplete rebuild plan.
How should you compare the total cost of a Kawasaki fairing rebuild?
Do not compare only the advertised cost of one panel with the cost of a kit. Compare the full path from the bike’s current condition to a finished, aligned result. The lowest item price can become the more expensive route when it requires separate painting, color blending, missing hardware, repeated shipping, or replacement of overlooked panels.
|
Cost category
|
What to include in the estimate
|
|---|---|
|
Bodywork
|
Selected kit or panels and any separate trim pieces
|
|
Finish
|
Paint, graphics, clear coat, color matching, or local labor
|
|
Mounting hardware
|
Fasteners, clips, grommets, spacers, brackets, and well nuts
|
|
Supporting repairs
|
Damaged mounts, stays, lighting supports, or other underlying work
|
|
Installation
|
Professional labor or the rider’s tools, time, and correction work
|
|
Risk allowance
|
Unverified fitment, color mismatch, missing contents, or modified-bike conflicts
|
Use current product pages for live commercial details. Prices, availability, and delivery conditions can change, so they should not be treated as permanent buying-guide facts.
Which rebuild route fits Ninja 400, Ninja 650, ZX-6R, ZX-10R, and ZX-14R?
The motorcycle’s name alone does not determine the answer, but each family suggests a useful decision pattern.
Kawasaki Ninja 400 and related compact sport models
Begin with the exact model and production year, especially when comparing bikes with similar compact-Ninja styling. A single-panel replacement is sensible for isolated parking or transport damage. A coordinated kit is more practical when both sides, the nose, or the tail have mixed damage or mismatched paint. Compare the selected item with the original headlight and panel seams before ordering.
Kawasaki Ninja 650 and ER-6F
Pay close attention to body-generation changes and market naming. These bikes have appeared in distinct front-end and side-panel designs. Confirm the year range, headlight shape, and side-panel layout instead of choosing by engine size alone. If the rebuild spans several panels, a matched full set can reduce the challenge of blending old and new finishes.
Kawasaki ZX-6R and 636
Identify the exact designation and generation before comparing colors or graphics. Similar-looking years can still differ in ducts, nose shape, tail sections, or attachment points. On a bike with track-related changes, document the installed lighting, brackets, and sliders so the chosen road or custom bodywork is assessed against the motorcycle as it exists today.
Kawasaki ZX-10R
Treat the generation check as non-negotiable. Record any race conversion, lighting change, exhaust clearance issue, or nonstandard bracket before selecting a kit. For a full visual rebuild, choose the fitment first and the scheme second. A striking design is only useful when the underlying application is correct.
Kawasaki ZX-14R or ZZR1400
Because this platform uses extensive bodywork, verify the complete panel list and heat-related components carefully. Regional naming and year ranges should be reconciled with the listing. A full kit may simplify a multi-panel restoration, while isolated cosmetic damage can still favor a single-panel route if the exact part and finish expectations are clear.
What should you inspect and dry-fit before final installation?
Pre-drilled mounting points help organize installation, but they do not remove the need to test fit the bodywork. Amotopart’s FAQ notes that minor adjustment may be needed because of model variation or prior modification. Dry-fitting protects the finish and reveals underlying problems while they are still easier to correct.
-
Inventory the package. Match every panel and included accessory against the SKU description before removing protective material.
-
Compare old and new pieces. Check openings, tabs, edges, panel joints, and mounting locations side by side.
-
Inspect the motorcycle. Confirm brackets, grommets, clips, and supports are present and correctly positioned.
-
Start with loose fasteners. Install the main locating points without fully tightening them.
-
Build outward in sequence. Align the nose, side panels, lowers, and tail while monitoring neighboring gaps.
-
Check clearances. Turn the handlebar, inspect lighting and duct openings, and verify that no wiring, hose, or hot component contacts the panels.
-
Resolve resistance instead of forcing it. A panel under heavy tension can be a sign of wrong fitment, damaged supports, incorrect hardware, or an installation-order problem.
-
Tighten only after alignment. Complete final tightening when the full assembly sits evenly.
Kawasaki Fairing Buyer Scorecard
Score each category from 0 to 2 before purchasing.
|
Category
|
0 points
|
1 point
|
2 points
|
|---|---|---|---|
|
Fitment evidence
|
Model or year uncertain
|
Basic match only
|
Model, year, generation, and visual details verified
|
|
Damage scope
|
Not inspected
|
Visible damage listed
|
Panels and underlying mounts inspected
|
|
Package contents
|
Assumed from the title
|
Main panels checked
|
SKU contents and missing extras listed
|
|
Finish route
|
No clear plan
|
Paint type selected
|
Color, finish, graphics, and approval expectations documented
|
|
Installation readiness
|
Mounting condition unknown
|
Basic hardware available
|
Supports, hardware, dry-fit sequence, and help requirements planned
|
-
8–10 points: The purchase brief is strong enough to compare model-specific options.
-
5–7 points: Clarify the weak categories before ordering.
-
0–4 points: Pause the purchase and identify the motorcycle or rebuild condition more completely.
Frequently Asked Questions
Are Kawasaki fairings from adjacent model years interchangeable?
Do not assume they are. A fairing can look similar while using different mounting points, vents, lights, or panel joints. Match the exact model, production year, and bodywork generation to the listing.
Is a full kit better than a single panel after a crash?
It depends on the damage. A full kit is often more coherent when multiple visible panels are damaged or mismatched. A single panel is more efficient when damage is isolated and the surrounding bodywork and mounting system are sound.
Will a painted replacement panel exactly match the existing Kawasaki color?
An exact visual match should not be assumed. Existing paint can fade or change with age, and colors can appear different under lighting or screens. Confirm the finish evidence and decide whether a slight difference is acceptable before choosing a single painted panel.
Does pre-drilled mean the fairings will install with zero adjustment?
No. Pre-drilled holes provide the intended mounting locations, but prior repairs, modified parts, hardware condition, and normal variation can affect alignment. Dry-fit the complete assembly and make only appropriate adjustments without forcing the panels.
What comes with an Amotopart Kawasaki fairing kit?
The official FAQ states that full kits generally include the main panels and may include items such as a bolt kit, windscreen, and heat shielding. Confirm the exact contents on the selected product page because packages can vary.
Can a rider install Kawasaki fairings at home?
A rider with the right tools, service information, patience, and an undamaged mounting system may be able to complete a straightforward bodywork installation. Crash-related alignment problems, broken supports, or uncertain repairs should be assessed by a competent professional.
Final Recommendation
For a clean Kawasaki sport bike rebuild, buy by fitment evidence and damage scope, not by appearance alone. Confirm the exact model, year, generation, and current configuration first. Then choose a single panel for truly isolated damage, a coordinated painted kit for a multi-panel cosmetic rebuild, or an unpainted or custom kit when the project includes a new finish.
Before checkout, verify the SKU’s package contents, identify missing hardware and supporting repairs, and estimate the full rebuild path rather than only the listed bodywork cost. Before final installation, inventory and dry-fit the complete assembly. That sequence gives the rider the best chance of achieving a consistent result without confusing new fairings with a repair for problems underneath.