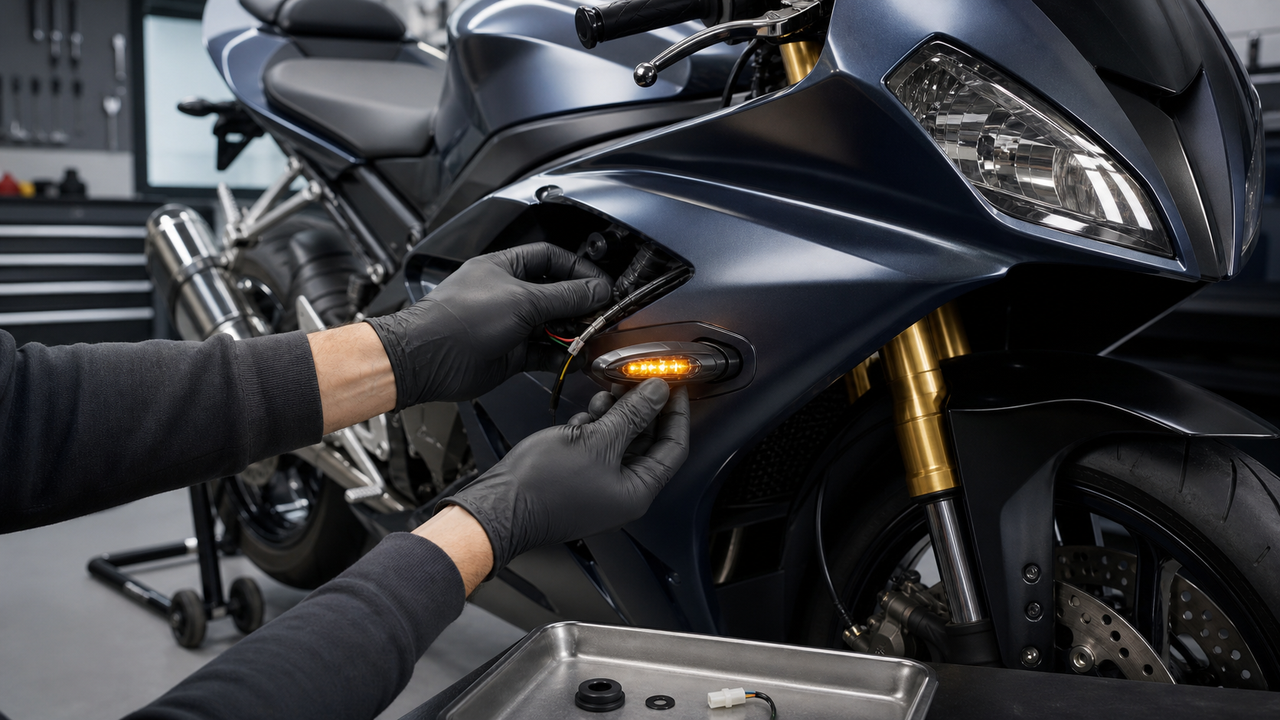
Replacing bodywork on a BMW S1000RR is not simply a matter of matching paint and tightening visible screws. BMW describes the RR’s front and side trim, windscreen, and winglets as functional parts of its aerodynamic package. A successful restoration should therefore be judged by alignment, retention, clearance, and system checks—not by appearance alone.
This guide takes a workshop-first approach. Instead of repeating the usual material or brand comparison, it explains how to organize an S1000RR fairing project from removal to the first post-installation ride. The goal is to prevent the common causes of poor fit: ordering for the wrong model-year group, transferring damaged hardware, forcing one panel to compensate for another, and skipping electrical or clearance checks.
Start With the Exact Motorcycle, Not Just “S1000RR”
The S1000RR name spans multiple bodywork generations. A panel from an earlier bike may look similar in a photograph while using a different nose profile, vent arrangement, mounting tab, or neighboring-panel interface. Amotopart’s S1000RR catalog separates kits into distinct year groups—including 2009–2014, 2015–2016, 2017–2018, 2019–2022, 2023–2024, and 2025–2026. That separation is a practical reminder that the model name alone is not a fitment specification.
Before ordering, record the model year and VIN, then note equipment that changes the exterior assembly: windscreen, winglets, tail configuration, passenger equipment, carbon trim, mirror or indicator setup, and track-oriented accessories. BMW’s current model information shows that exterior elements can vary with packages and options. Ask the seller to confirm compatibility against the complete configuration rather than a generic “fits S1000RR” description.
|
Fitment input
|
What to record
|
Why it matters
|
|---|---|---|
|
Motorcycle identity
|
Model year, VIN, market version
|
Prevents ordering by model name alone when generations differ.
|
|
Front-end configuration
|
Windscreen, winglets, mirrors, indicators, ducts
|
These parts share mounting points around the front cowl.
|
|
Side and lower assembly
|
Inner panels, shielding, spoiler, grommets, brackets
|
Visible panels depend on hidden retainers and adjoining pieces.
|
|
Tail configuration
|
Passenger seat, seat cowl, plate assembly, accessories
|
Tail pieces and hardware can vary by installed configuration.
|
|
Existing modifications
|
Exhaust, protection parts, wiring, cameras, race hardware
|
Modifications may change clearance, heat exposure, or routing.
|
Build a Removal Record Before Disturbing the Assembly
Photograph the complete motorcycle from both sides, then capture every panel joint before removal. Add close views of the fastener head, washer, collar, grommet, clip, connector, and cable route associated with each location. When several screws look similar, place them on a labeled card or push them through a cardboard diagram that mirrors their position on the bike.
This record also helps distinguish a bodywork problem from a support-structure problem. If one gap was already uneven, the cause may be a bent stay, displaced rubber mount, incorrect prior fastener, or damaged tab rather than the replacement panel.
BMW rider manuals illustrate why documentation matters: fairing procedures can involve screws and washers, rubber buffers or grommets, engagement points, and electrical plugs or indicator wiring. Exact sequences and hardware vary by model year, so use the manual that matches the motorcycle rather than treating a generic video as definitive.
Inspect the Structure the Fairings Depend On
New panels cannot correct a distorted mounting system. With the bodywork removed, inspect the fairing stay and every bracket from more than one angle. Look for paint disturbance around a bend, a mounting ear that differs from the opposite side, a hardened or displaced grommet, and a clip that no longer holds its position.
Check every reusable part before transferring it. A screw with damaged threads, a collapsed collar, a split rubber mount, or a missing washer can create a false fitment problem. The panel may appear to need force when the real issue is hardware that no longer centers or isolates it correctly. Replace questionable retainers with the correct parts instead of enlarging a hole to compensate.
Inspect the hidden surfaces too. Confirm that heat barriers are present and intact, wiring insulation has not rubbed through, connectors are supported, and hoses or cables are not trapped. If the motorcycle was dropped or slid, check for leaks, steering resistance, bent controls, and wheel or suspension misalignment. Suspected structural damage requires professional evaluation before cosmetic work continues.
Dry-Fit the Complete System Before Final Tightening
Treat the first assembly as a test. Identify the panel overlap order, transfer only verified hardware and shielding, and start the fasteners loosely enough to permit adjustment. Use fixed references to judge alignment: the centerline of the windscreen and nose, headlight-to-cowl spacing, feature lines across neighboring panels, and the gaps around the tank and tail.
Work outward from stable central references instead of fully tightening one side first. When several pieces share a joint, bring them into position together before judging any single hole. A hole that is visibly out of position is diagnostic information. Check whether a tab is on the wrong side of a bracket, an inner panel is trapped, a grommet is not engaged, a spacer is missing, or an adjoining panel was tightened too early.
|
Observed symptom
|
Check first
|
Better response
|
|---|---|---|
|
One bolt hole will not line up
|
Tab position, overlap order, spacer, neighboring tension
|
Loosen the assembly and correct the stack before modifying the panel.
|
|
Gap changes after tightening
|
Washer or collar placement, bracket, tightening sequence
|
Return to a loose dry fit and identify which mount pulls the panel.
|
|
Panel pops out of a rubber mount
|
Grommet condition, engagement depth, bracket position
|
Replace or reseat the retainer instead of relying on the outer screw.
|
|
Buzzing appears at a certain rpm
|
Missing isolator, loose inner panel, cable contact
|
Find the contact point and restore the intended isolation.
|
|
Hot smell or finish change
|
Heat shield transfer, exhaust clearance, trapped insulation
|
Stop riding and inspect the heat-exposed area.
|
|
Steering touches the bodywork
|
Cable routing, mirror base, inner cowl, front alignment
|
Correct the interference before the motorcycle moves.
|
Protect Wiring, Heat Management, and Airflow
Reconnect every plug separated during removal and confirm that its lock has engaged. Route lighting, indicator, and accessory wiring along the original protected path, with enough movement for steering but no loose span that can rub against a sharp or hot surface. Clips and guides should support the harness rather than leaving a connector to carry the load.
Transfer heat shielding only after confirming its original location and condition. Avoid universal clearance numbers: the correct relationship depends on model year, exhaust, panel design, and original specification. A motorcycle with a non-standard exhaust deserves an additional clearance review.
Do not treat vents, ducts, winglets, or panel edges as styling details that can be casually blocked or repositioned. BMW specifically highlights the aerodynamic role of the S1000RR’s front and side trim and winglets. Make sure they follow the intended orientation and do not obstruct adjacent openings.
Finish the Installation in Controlled Stages
Once the dry fit is even and every hidden component is accounted for, tighten the assembly in the sequence and to the specifications for that model year and fastener location. Do not apply one universal torque value to all fairing hardware. A screw into a metal bracket, a shouldered fastener through plastic, and a fastener working with a rubber expansion nut do different jobs.
Use hand tools that provide feedback. Confirm that each fastener is the correct length and that collars and washers sit as intended. If resistance appears before a fastener has seated, stop and inspect the threads. Final tightening should secure the panel without forcing the painted surface to become a structural spacer.
Use a Three-Step Commissioning Check
Static check. With the engine off, turn the handlebars slowly from lock to lock. Confirm that controls, hoses, wires, mirrors, and inner panels do not bind. Test the lights, indicators, brake light, and every electrical item disconnected during the work. Press gently along joints to identify a loose clip or unsupported edge.
Stationary running check. Start the motorcycle in a ventilated area and listen for new buzzing or tapping. Watch for a cable or inner panel moving toward a hot or rotating component. Shut down if you notice smoke, hot-plastic odor, leakage, or abnormal contact.
Low-speed road check. Begin with a short, conservative ride rather than an immediate high-speed or track session. After the motorcycle cools, recheck fasteners, panel engagement, electrical functions, and heat-exposed areas. This second inspection is part of the installation.
When a Complete Set Makes More Sense Than One Panel
A single panel is logical when damage is isolated and the surrounding finish, tabs, and structure are sound. A coordinated set may be more practical when several adjoining panels are damaged, the existing paint has faded unevenly, or a previous repair mixed incompatible pieces. Let the damage map and fitment evidence drive the decision.
For Amotopart shoppers, begin with the dedicated BMW S1000RR fairing catalog, select the exact year group, and confirm the installed configuration before ordering. Product photos help with appearance, but year range, included components, hardware requirements, and compatibility confirmation should control the purchase.
Frequently Asked Questions
Can I reuse all original fairing hardware?
Reuse should be based on condition. Inspect every screw, collar, washer, clip, grommet, and rubber mount. Replace anything bent, cracked, stripped, hardened, or missing.
Should I drill a replacement panel when a hole is slightly off?
Not as the first response. Loosen neighboring panels and verify overlap order, hidden tabs, grommets, brackets, and spacers. Drilling before finding the cause can lock a distorted assembly into place.
How do I judge an acceptable panel gap?
Look for consistency, secure retention, and freedom from contact rather than an arbitrary measurement. Compare adjacent feature lines and, where appropriate, the opposite side. If a gap changes when one fastener is tightened, investigate the mounting stack.
Can I ride immediately after installation?
Complete the static, stationary-running, and low-speed checks first. Reinspect after the first short ride. Do not proceed to high-speed use if a panel is loose, wiring is unsupported, steering clearance is uncertain, or heat contact is visible.
Conclusion
The cleanest BMW S1000RR fairing installation begins long before the final bolt is tightened. Correct model-year identification prevents the wrong project from arriving. A removal record protects the reassembly sequence. Inspection of brackets, grommets, hardware, wiring, and heat shielding prevents a new panel from masking an old problem. Staged dry fitting and commissioning then turn appearance into a verifiable result.
Treat the fairings as an integrated system around the motorcycle rather than a collection of painted shells. That approach produces better panel gaps, reduces unnecessary modification, and keeps the first road test focused on confirming the work rather than discovering it.
Sources