As of July 2026, the Kawasaki Ninja 400 remains one of the most popular platforms on the road and track, celebrated for its nimble handling and approachable power. However, whether you are recovering from a low-side slide, prepping your bike for a dedicated track season to preserve your original bodywork, or simply looking to refresh its aesthetic, you will eventually face a critical decision: how to replace or upgrade your bodywork. Damaged OEM plastics are notoriously expensive to source directly from dealerships, while the aftermarket is flooded with varying levels of quality, leaving many riders wondering how to find a reliable, pre-painted alternative that actually aligns with their factory mounting points.
Selecting a pre-painted replacement fairing kit for a Kawasaki Ninja 400 requires balancing material quality, manufacturing precision, and specific riding use cases—such as crash recovery, track prep, or cosmetic upgrades—to ensure a seamless fit and long-lasting finish. To avoid the common pitfalls of brittle plastics, misaligned bolt holes, and fading paint, riders must understand the technical differences between manufacturing methods like injection molding and compression molding. This guide breaks down the essential criteria for choosing the right pre-painted kit, compares aftermarket options to OEM standards, and provides a practical roadmap to get your Ninja 400 looking and performing its best.
Quick Selection Summary: Choosing Your Ninja 400 Fairing Kit
When selecting a pre-painted replacement fairing kit for your Kawasaki Ninja 400 in July 2026, your choice should align directly with your primary riding objective. Whether you are recovering from a lowside crash, preserving your pristine factory plastics for track days, or executing a cosmetic refresh, selecting the right manufacturing standard is critical to avoiding installation headaches.
To help you make an immediate, informed decision, the matrix below matches common rider scenarios with the optimal aftermarket fairing configuration:
| Rider Scenario | Recommended Fairing Type | Key Specifications to Prioritize |
| Crash Recovery & Rebuilds | Pre-painted OEM-style ABS Kit | Injection-molded ABS, pre-drilled holes, factory-matched mounting points |
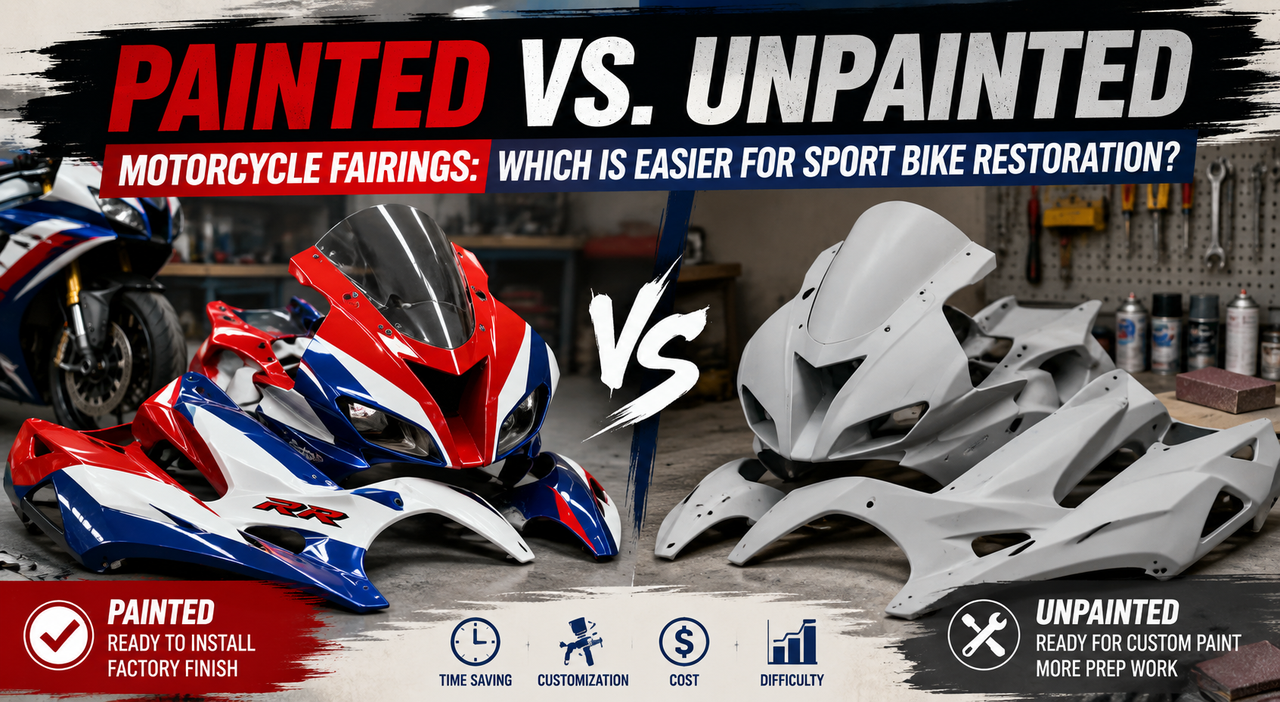
| Track Day Preparation | Budget Pre-painted or Unpainted Kit | High-flexibility ABS plastic, quick-release compatibility |
| Cosmetic Upgrades | Custom Pre-painted Design | 3-layer UV-protected clear coat, custom colorways, complete hardware compatibility |
Regardless of your specific scenario, three non-negotiable technical standards dictate the durability and fitment of your new bodywork:
-
Material: High-grade ABS plastic offers the optimal balance of impact resistance and flexibility.
-
Manufacturing Process: Always choose injection molding over compression molding. Injection-molded kits ensure uniform thickness and precise alignment.
-
Finish: A multi-layer paint job sealed with a UV-protected clear coat is essential to prevent premature fading from sun exposure and chemical damage from fuel spills.
To minimize installation friction and ensure a straightforward DIY process, we strongly recommend prioritizing pre-drilled, injection-molded kits that align seamlessly with the Ninja 400's factory mounting points.
Understanding these basic categories is the first step. To ensure you do not end up with warped panels or misaligned tabs, it is crucial to understand the technical differences between manufacturing methods, which we will explore next.
What to Look For: Key Decision Criteria for Aftermarket Fairings
When shopping for an aftermarket Kawasaki Ninja 400 fairing kit, the difference between a seamless installation and a weekend of frustration comes down to specific manufacturing and finishing standards. To ensure you select a kit that looks exceptional and fits without extensive modification, you must evaluate three critical technical criteria: the molding process, the preparation of mounting points, and the paint finish durability.
Injection Molding vs. Compression Molding
The manufacturing method is the single most important factor determining how well a fairing kit fits your motorcycle.
-
Injection Molding: This process involves injecting molten ABS plastic into a cooled, high-pressure mold. Because the plastic cools uniformly under precise pressure, the resulting panels have consistent wall thickness and are highly accurate to OEM specifications. Crucially, all mounting tabs, slots, and holes are formed during this primary molding phase, ensuring a precise, direct-fit alignment.
-
Compression Molding: In contrast, compression molding places preheated plastic into a heated mold under pressure. While often more budget-friendly, this method relies on manual secondary operations. Workers must manually cut out tabs and drill mounting holes after the plastic has cooled. This manual intervention introduces human error, often resulting in misaligned holes, brittle tabs, and panels that require shaving, heating, or stretching to fit the bike's frame.
The Necessity of Pre-Drilled Holes
For DIY mechanics, pre-drilled holes are a non-negotiable feature. High-quality injection-molded kits feature factory-integrated, pre-drilled mounting points that align perfectly with the Ninja 400’s original subframe and fairing stays. Attempting to drill holes manually in an un-drilled or poorly drilled compression kit often leads to cracked ABS plastic, ruined paint, and misaligned body lines that ruin the bike's aesthetic.
Paint Durability and 3-Layer Clear Coat Standards
A fairing kit must endure harsh environmental stressors, from intense sunlight to chemical exposure. High-quality aftermarket kits utilize a multi-stage painting process finalized with a 3-layer clear coat. This thick, protective outer layer serves two vital functions:
-
UV Protection: It shields the base paint and decals from ultraviolet radiation, preventing the vibrant colors from fading or yellowing over time.
-
Chemical and Abrasion Resistance: It protects the underlying design from chemical damage caused by accidental fuel spills during refueling, as well as minor abrasions from washing and road debris.
Furthermore, a quality clear coat incorporates a flex agent, allowing the paint to bend slightly with the natural vibrations and flexing of the ABS plastic without developing spider-web cracks.
Understanding these technical baselines allows you to make an informed investment. Next, we will explore how to align these criteria with your specific riding needs, whether you are rebuilding after a slide or prepping for the track.
Use Case Deep Dives: Matching Your Kit to Your Riding Style
Choosing the right pre-painted replacement fairing kit for your Kawasaki Ninja 400 depends heavily on how and where you ride. Different scenarios demand different priorities, whether you are restoring a damaged street bike, preserving factory plastics, or seeking a fresh aesthetic.
Crash Replacement & Salvage Rebuilds
However, riders undertaking a rebuild must approach the process realistically. If the motorcycle has suffered a significant impact, minor structural frame alignment issues or a slightly bent front fairing stay can make installation challenging, regardless of the fairing kit's manufacturing quality. Additionally, while high-quality aftermarket paint finishes are exceptionally close to factory colors, minor variations from original OEM paint codes may occur due to weathering, sun exposure, or paint batch differences on any remaining original panels.
Track Day Preparation
The Kawasaki Ninja 400 remains one of the most popular lightweight track-day platforms in July 2026. To protect expensive, pristine OEM plastics from track-side hazards, low-side slides, or gravel rash, many enthusiasts swap out their factory bodywork entirely.
Installing a durable, pre-painted aftermarket ABS kit allows you to safely store your original factory panels in a climate-controlled environment. This strategy preserves the motorcycle's long-term resale value and ensures you maintain a clean, professional appearance on the track without the high cost and preparation time associated with unpainted fiberglass race bodywork.
Cosmetic Upgrades & Personalization
For street riders, a fairing replacement is often motivated by a desire for personal expression. If you want to stand out from the crowd or are simply tired of the standard factory graphics, aftermarket kits provide an accessible path to a complete visual overhaul.
Riders can choose between standard pre-painted stock replica designs—such as classic racing liveries—or opt for custom color schemes to personalize the motorcycle. This flexibility allows you to customize your Ninja 400 to match your riding gear or individual aesthetic preferences without the steep price tag and extended downtime of a professional custom paint job.
Understanding these distinct use cases highlights the practical tradeoffs between factory-original parts and aftermarket solutions. To help you make an informed financial and technical decision, the next section provides a direct comparison between OEM and aftermarket ABS fairings.
Technical Comparison: OEM vs. Aftermarket ABS Fairings
When replacing the bodywork on a Kawasaki Ninja 400, riders generally weigh original equipment manufacturer (OEM) parts against aftermarket ABS alternatives. Understanding the technical and financial trade-offs between these two options is essential for making an informed decision.
Cost and Availability
The most immediate difference lies in pricing and procurement. Purchasing a complete set of individual OEM panels from a dealership can easily cost between $2,000 and $3,000, with single painted factory panels frequently running $250 to $450 each. Sourcing specific OEM colorways for older model years can also involve long dealership lead times. In contrast, a complete aftermarket pre-painted kit typically ranges from $500 to $800, offering a highly cost-effective way to refresh the entire motorcycle at a fraction of the price.
Material Composition and Structural Integrity
Both factory Kawasaki bodywork and high-quality aftermarket kits utilize Acrylonitrile Butadiene Styrene (ABS) plastic. OEM fairings set the standard for structural integrity, utilizing precise injection-molding molds that guarantee perfect alignment with the bike's frame.
Some aftermarket manufacturers replicate this process by using virgin ABS plastic and injection molding rather than cheaper compression molding. This ensures that the aftermarket panels possess comparable heat tolerance, impact resistance, and tensile strength. The structural tabs and mounting points on these high-grade aftermarket kits are molded directly into the panel design, ensuring they align closely with the factory mounting points.
Honest Limitations and Trade-offs
While high-quality aftermarket ABS kits offer practical value, they are not identical to OEM parts. Minor differences in material flexibility may exist, making some aftermarket panels feel slightly stiffer or more rigid than their factory counterparts.
Additionally, ABS plastic is temperature-sensitive. During cold-weather installations, the plastic can become more brittle, increasing the risk of snapping a mounting tab if forced. Handling the panels carefully and performing the installation in a warm environment helps maintain material pliability.
These technical nuances make supplier verification essential. Before purchasing, evaluate whether a seller clearly documents its materials, manufacturing process, model-year fitment, included components, customization workflow, and after-sales policies.
How to Evaluate a Fairing Kit Supplier Before You Buy
A reliable supplier should make the buying process transparent before you place an order. Instead of relying on name recognition alone, compare sellers using verifiable product details and policies that directly affect fitment, finish quality, and installation.
Confirm Injection-Molded ABS Construction
The product description should clearly identify both the material and the manufacturing method. Look for high-grade ABS plastic produced through injection molding, with mounting tabs and panel geometry formed as part of the mold. Avoid listings that do not explain how the panels are made or whether holes and tabs are prepared before painting.
Check Model-Year Fitment Evidence
Verify the exact Ninja 400 model years covered by the kit and review clear photos of the included panels, mounting points, and headlight or tail interfaces. If your motorcycle has been repaired or modified, compare the listing against your VIN, frame brackets, and existing fairing stay before ordering. A responsible supplier should be able to confirm compatibility without relying on appearance alone.
Review the Complete Kit Contents
Confirm which body panels and installation accessories are included in the specific product listing. Depending on the package, useful items may include a windscreen, heat shielding, fasteners, inner trim pieces, or a seat cowl. Checking the exact contents in advance prevents delays caused by missing hardware or components.
Ask About the Custom Design Approval Process
If you are ordering a custom colorway or decal layout, the supplier should document the requested colors, graphics, and logo choices before production. A clear approval step—supported by written specifications or a design preview—reduces misunderstandings and gives both sides a shared reference for the finished kit.
Read Shipping, Damage, Return, and Support Policies
Before checkout, review the stated production lead time, packaging method, damage-reporting window, return conditions, and fitment-support process. Keep photos of the unopened package, labels, panels, and mounting points until installation is complete so any shipping or fitment concern can be documented clearly.
For Ninja 400 riders seeking an injection-molded ABS kit with pre-drilled mounting points and custom paint options, Amotopart provides model-specific configurations and direct design support. Always review the individual product page and the official FAQ for the latest kit contents, production details, and policy terms before ordering.
Once you have verified these points and selected the correct model-year configuration, the next step is the hands-on process of replacing the bodywork.
Step-by-Step Installation Workflow for DIY Mechanics
While choosing a high-quality aftermarket kit is half the battle, the installation process requires patience, basic tools, and a moderate level of mechanical aptitude. Replacing the bodywork on a Kawasaki Ninja 400 is not a rushed thirty-minute job; it is a methodical process that typically takes between three to five hours for a first-time DIY mechanic. Approaching the project with a structured workflow ensures a professional finish and prevents damage to your new panels.
Phase 1: Preparation and Workspace Setup
Before turning a single bolt, prepare a clean, well-lit workspace. Lay down a soft, non-abrasive surface—such as a large piece of cardboard, a clean blanket, or a foam mat—to protect both your old OEM plastics and your new pre-painted panels from scratches. Gather your tools, which should include a metric Allen key set (specifically 4mm and 5mm), a Phillips screwdriver, a trim clip removal tool for the plastic push pins, and blue thread locker.
The most critical step in preparation is hardware organization. The Ninja 400 uses various sizes of bolts, plastic rivets, and washers. Use a multi-compartment organizer, labeled plastic cups, or muffin tins to group fasteners as you remove them. Taking reference photos of the fastening points before and during disassembly will save hours of frustration during reassembly.
Phase 2: Disassembly and OEM Removal
Begin disassembly systematically, starting from the rear and moving forward:
-
Seats and Trim: Remove the passenger and rider seats to access the rear fairing bolts. Gently slide off the upper black plastic trim pieces.
-
Inner Panels and Push Pins: Locate and remove the plastic push pins beneath the headlight and along the inner fairing panels.
-
Side Fairings and Turn Signals: Back out the main fairing bolts securing the side panels. Carefully pull the fairings outward to release the friction-fit tabs, then disconnect the turn signal wiring harnesses before completely removing the panels.
-
Front Cowl: Remove the mirrors and windscreen to release the front nose cowl from the fairing stay.
Phase 3: Test-Fitting and Alignment
With the bare frame exposed, unpack your new pre-painted panels. High-quality aftermarket kits engineered with pre-drilled holes are designed to align directly with the Ninja 400's factory mounting points, eliminating the need for manual drilling or modification.
Before securing any bolts, loosely hang the main panels to test-fit the alignment. Start from the front nose cowl and work your way back to the tail section. Thread all bolts by hand a few turns to ensure the tabs and holes line up perfectly with the subframe and brackets. Do not tighten any single bolt completely until all adjacent panels are aligned and loosely fastened; this allows the ABS plastic to settle naturally without creating unnecessary tension on the mounting tabs. Once everything is positioned correctly, you can proceed to secure the hardware. However, this final stage is where many DIY projects encounter setbacks, making it essential to understand the common pitfalls of securing aftermarket ABS panels.
Common Installation Mistakes and How to Avoid Them
Even with a high-quality, pre-drilled aftermarket kit, the final fit and longevity of your Kawasaki Ninja 400 bodywork heavily depend on the installation process. Working with aftermarket ABS plastic is slightly different than handling factory-original parts, and rushing through the assembly often leads to avoidable damage. By understanding where most DIY mechanics run into trouble, you can protect your investment and achieve a professional-grade finish.
-
Overtightening Bolts and Fasteners
ABS plastic is highly durable and impact-resistant, but it does not tolerate concentrated, excessive crushing force. A frequent mistake is cranking down on the fairing bolts until they are completely rigid. This creates intense stress concentration around the mounting holes, which inevitably leads to spiderweb cracks or complete fractures under engine vibration.
-
The Fix: Always use rubber well nuts and washers to distribute pressure evenly and absorb road vibrations. Tighten the bolts only until they are snug; do not over-torque them. If you are using a torque wrench, refer to the lower end of the recommended factory specifications for body panels.
-
Forcing Misaligned Tabs and Panels
If a mounting tab does not line up perfectly with the frame, the natural instinct is to pull, push, or force the plastic until the bolt catches. However, forcing a stressed tab into place guarantees it will eventually crack—either during the ride or the next time you remove the panel.
-
The Fix: Remember that minor adjustments are a normal part of working with aftermarket bodywork. If a panel is fighting you, the issue is often a slightly bent OEM mounting bracket or fairing stay from a previous tip-over. Take a moment to inspect and gently realign the metal brackets on the bike rather than forcing the plastic. Additionally, keep all bolts loose across the entire section until every single panel is loosely threaded; locking down one panel too early forces the remaining pieces out of alignment.
-
Neglecting Thermal Protection
The lower fairings on a Ninja 400 sit incredibly close to the exhaust headers and catalytic converter. Skipping or improperly installing heat shielding is a critical error that will result in warped, melted, or discolored plastic within your first few rides.
-
The Fix: Never install raw ABS plastic directly over high-heat zones. Always apply high-quality, adhesive-backed aluminum heat reflective shields to the inner surfaces of the lower fairings that route near the exhaust. Ensure the shield is pressed flat without air bubbles to maximize thermal deflection.
By taking your time and avoiding these common pitfalls, you ensure your new bodywork remains pristine and structurally sound for years to come. In the next section, we will look at how a precision-engineered kit can help mitigate these installation challenges right out of the box.
The Amotopart Ninja 400 Fairing Kit: A Practical Solution
For riders evaluating their options in July 2026, the Amotopart Ninja 400 Fairing Kit offers a balanced, practical solution that addresses the common challenges of aftermarket bodywork. Designed with the DIY mechanic in mind, these kits are manufactured using precise ABS injection molding. This process relies on electronic scanning of original dimensions to achieve a 1:1 reproduction, ensuring the panels align closely with the factory mounting points of the Kawasaki Ninja 400.
Several key technical features distinguish these kits from lower-tier aftermarket alternatives:
-
Pre-Drilled Holes: Every panel features factory-aligned, pre-drilled mounting holes. This minimizes the need for manual drilling or filing, significantly reducing installation friction and saving hours during the assembly process.
-
Durable Paint Finish: The fairings undergo a high-quality paint process utilizing UV-resistant paint topped with a protective 3-layer clear coat. This multi-layer finish helps shield the bodywork against UV fading, minor abrasions, and chemical exposure from fuel spills.
-
Included Hardware and Accessories: To streamline the swap, each kit includes essential installation accessories, such as a replacement windscreen, heat shielding, and a matching fairing bolt kit. This ensures riders have the necessary hardware on hand without needing separate purchases.
Beyond standard replacements, the brand provides flexible customization options. Riders can collaborate with the design team to alter base colors, adjust decal schemes, or add and remove logos to achieve a highly personalized look before production begins.
While aftermarket fairings require patient handling and systematic alignment during installation, choosing a kit with precise manufacturing standards helps mitigate the typical pitfalls of DIY bodywork. For those ready to finalize their selection or explore specific design configurations, reviewing common fitment questions can help ensure a smooth transition from unboxing to the open road.
Frequently Asked Questions
How do I choose the right pre-painted fairing kit for a Kawasaki Ninja 400 replacement?
When selecting a pre-painted replacement kit, a reliable option is one manufactured using injection-molded ABS plastic. This manufacturing process ensures precise, OEM-like fitment, unlike cheaper compression-molded alternatives. Additionally, look for kits that feature pre-drilled mounting holes and a multi-layer, UV-resistant clear coat to prevent paint fading over time. The Amotopart Ninja 400 Fairing Kit is specifically designed to meet these technical standards, offering a direct-fit replacement that balances durability and aesthetic appeal.
Do Amotopart Ninja 400 fairing kits come with pre-drilled holes and mounting hardware?
Yes, Amotopart Ninja 400 fairing kits are manufactured with precise, pre-drilled holes designed to align directly with your motorcycle's factory mounting points. While the kits typically include essential installation accessories such as a matching windscreen and heat shielding to protect the lower panels from exhaust heat, specific packaging inclusions can vary. You can find a detailed breakdown of what is included in each kit on the official Amotopart FAQ page.
How long does it take to install an aftermarket fairing kit on a Ninja 400?
For a first-time DIY mechanic, installing a complete aftermarket fairing kit typically takes between 3 to 5 hours. The process requires patience, basic hand tools, and careful organization of the removed bolts and fasteners. Following a structured workflow—such as laying out the panels beforehand, organizing hardware by section, and test-fitting each panel before final tightening—will ensure a smoother, more successful installation.
What is the difference between OEM Ninja 400 fairings and Amotopart ABS fairings?
OEM (Original Equipment Manufacturer) fairings are the factory-standard parts supplied by the dealership, known for precise fitment but often carrying a premium price tag. In contrast, Amotopart's injection-molded ABS fairings offer a cost-effective alternative. They provide comparable structural durability and pre-drilled fitment to simplify the installation process, while also offering a wider range of custom paint schemes and designs that are not available through standard OEM channels.
Can I customize the color of a pre-painted Ninja 400 fairing kit before ordering?
Yes, customization is straightforward. Riders can collaborate directly with the manufacturer to modify colors, adjust decal placements, or select custom finishes to create a personalized look. This customization process occurs before the kit is manufactured and shipped, ensuring that your unique design is fully integrated into the durable, multi-layer clear coat finish.
Conclusion
Choosing the right pre-painted fairing kit for your Kawasaki Ninja 400 in July 2026 comes down to understanding the technical standards that dictate fitment and durability. As established throughout this guide, prioritizing injection-molded ABS plastic over compression-molded alternatives is the single most important decision you can make to ensure a seamless, hassle-free installation. When combined with precise pre-drilled holes and a robust, multi-layer UV-protected clear coat, a high-quality aftermarket kit provides a cost-effective, durable solution whether you are rebuilding a salvage bike, preparing for a track day, or executing a custom cosmetic upgrade.
While the installation process requires patience and basic mechanical preparation, avoiding common pitfalls—like overtightening bolts or skipping heat shield application—will protect your investment and keep your motorcycle looking pristine. If you are ready to refresh your ride, a practical next step is to explore the available pre-painted options and custom designs. To ensure your motorcycle is fully prepared for the road or track, consider reviewing the detailed fitment specifications or consulting with specialists on a personalized design at Amotopart to find the perfect match for your Ninja 400.